
Micron Vacuum Targets: 500, 250, 20–50 Microns for HVAC Techs

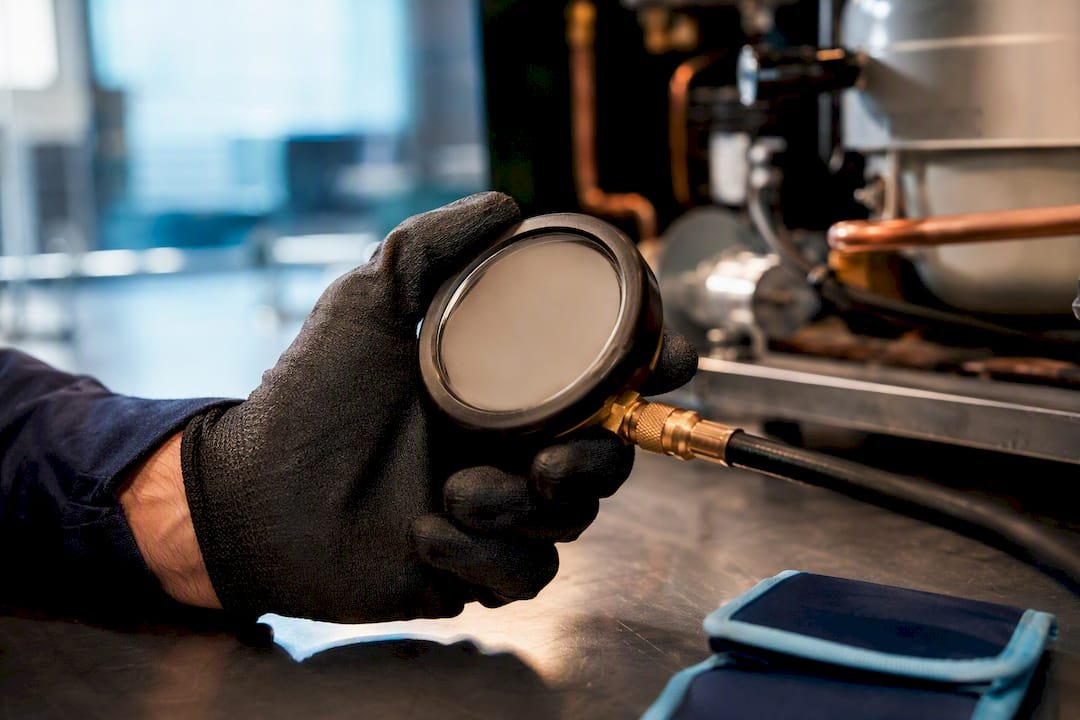
Aim for 500 microns or below on typical residential systems, 250 microns on POE-oil and VRF equipment, and follow manufacturer specs on ultra-low-temp refrigeration. Hitting the number is not the finish line, though. A standing-vacuum decay test after the pump isolates is what actually proves the system is dry and tight, and a quick pump bench test confirming under 100 microns tells you the tool doing the work is trustworthy.
TL;DR:
- A standing-vacuum decay test is essential after evacuation to confirm the system is dry and tight, with a stable reading below 1,000 microns for mineral-oil systems.
- Use a pump that can bench-test below 100 microns within 30 to 60 seconds, and place the micron gauge at the furthest point from the pump to avoid false readings.
- Evacuation should follow a staged process, including bulk removal, multiple nitrogen breaks, and final pull-down to the system’s specific micron target, depending on the system type.
- Achieving the correct micron level is insufficient without performing and recording a decay test to ensure the vacuum holds for at least 10 minutes, indicating an absence of leaks.
- Proper tools such as appropriately sized pumps, accurate micron gauges, and clean hoses are crucial, and verifying their performance before and after each job helps prevent callbacks.
Table of Contents
- Recommended Micron Levels By System Type
- Why Micron Levels Matter More Than Inches of Mercury
- Validating Your Pump and Micron Gauge
- The Evacuation Procedure Step by Step
- Reading a Stalled Evacuation Correctly
- How Hvac-prime Supports a Proper Evacuation
- What Actually Separates Good Evacuations From Bad Ones
- Get the Right Tools for a Clean Evacuation
- Sources
- FAQ
Recommended Micron Levels By System Type
The right target depends on the oil, the refrigerant, and how forgiving the manufacturer’s warranty language is. Mineral-oil residential systems tolerate more residual moisture than POE-oil systems, because POE oil is hygroscopic and pulls water out of the air like a sponge.
Here’s how the targets break down in practice:
- Residential split systems: Finish at 500 microns or below. When time allows, push to 300 to 400 microns for commissioning, since industry-standard evacuation targets treat 500 as the ceiling, not the goal.
- POE-oil systems (R-410A, R-404A): Target 250 microns. The oil’s tendency to absorb moisture means a “good enough” residential number leaves too much water behind.
- VRF and VRV systems: Stay under 250 microns, and budget extra evacuation time. Long line sets and multiple indoor units create more surface area for trapped moisture and more branch joints where air can hide.
- Ultra-low-temperature refrigeration: Follow the manufacturer’s spec sheet. Some units call for 20 to 50 microns, and the decay hold threshold is often tighter than anything you’d use on a comfort-cooling job.
None of these numbers are arbitrary. They map directly to how water behaves at low pressure, which is the physics worth understanding before you trust any gauge reading.
Why Micron Levels Matter More Than Inches of Mercury
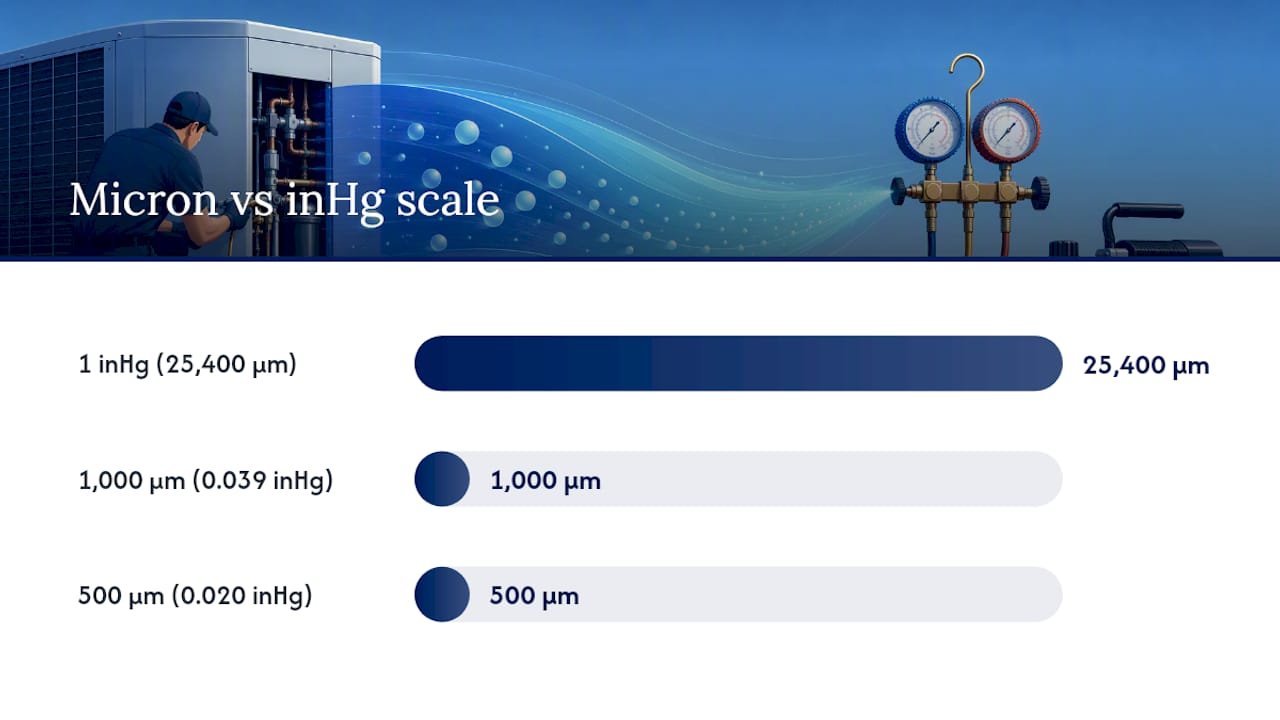
A micron is a unit of absolute pressure, not a comparison to atmospheric pressure the way inches of mercury are. That distinction is why the micron scale gives technicians finer resolution for tracking dehydration than a compound gauge ever could. One inch of mercury equals roughly 25,400 microns, so 500 microns works out to about 0.020 inHg and 1,000 microns to about 0.039 inHg. Try reading that difference on an analog dial and you’ll understand why micron gauges exist.
That single fact explains the entire rule of thumb. Pulling a deeper vacuum lowers water’s boiling point far enough that trapped moisture evaporates and gets carried out by the pump, even at shop-floor ambient temperature. It’s not about “sucking harder.” It’s about hitting a pressure where liquid water can’t exist anymore.
That also explains the difference between two things technicians often conflate:
- Degassing is bulk air removal, and most of it happens by the time you reach 5,000 microns, where roughly 99.34% of degassing has occurred.
- Dehydration is the slower process of pulling out moisture, and it only becomes meaningful below about 1,000 microns.
If you stop at 5,000 microns thinking the job is done, you’ve removed the air. The water is still in there.
Validating Your Pump and Micron Gauge
Before you trust any reading on a live system, prove the tools are honest. A pump that lies to you wastes hours and risks a callback.
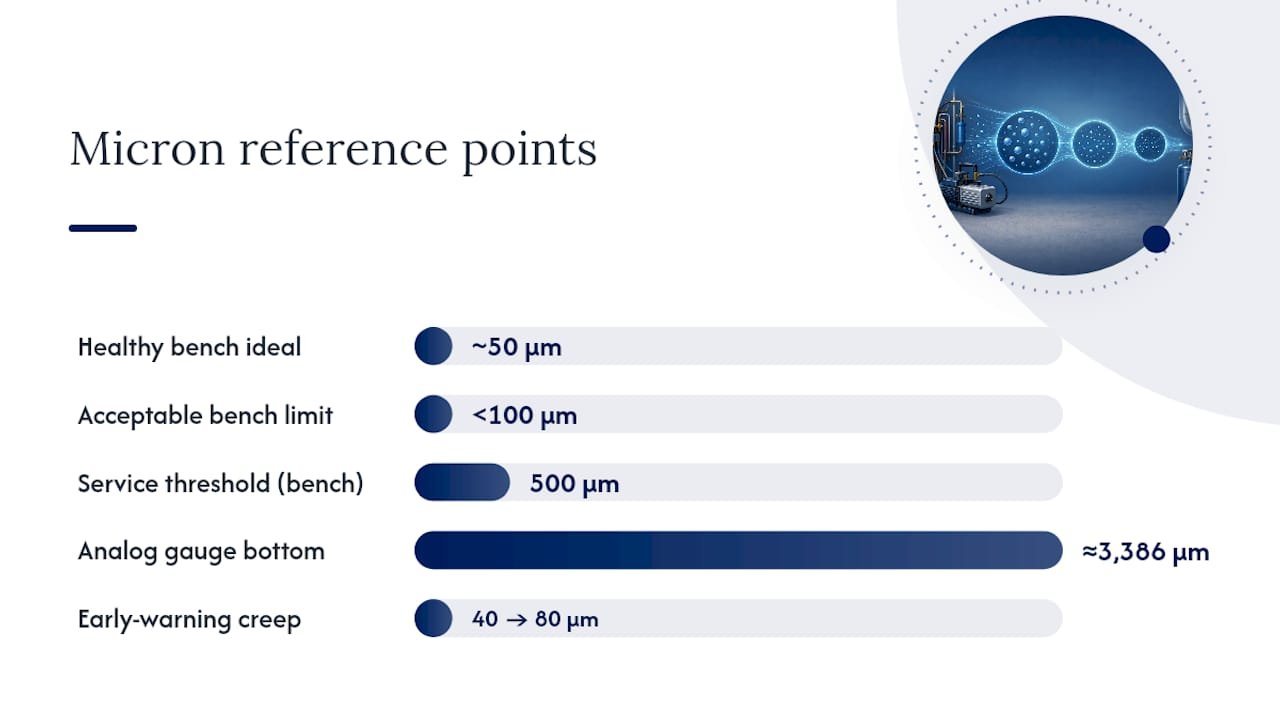
- Bench-test the pump. Connect it directly to your micron gauge with no system attached. A healthy pump should pull below 100 microns, ideally around 50, within 30 to 60 seconds.
- Service it if it fails. If the pump can’t clear 500 microns on the bench, change the oil first. If that doesn’t fix it, the valves likely need service or replacement.
- Place the gauge correctly. Mount it at the point on the system farthest from the pump, never right next to it. A gauge close to the pump reads artificially low and hides restrictions elsewhere in the line.
- Check your hoses and fittings. Use short, large-bore hoses with clean cores, and inspect Schrader valve depressors and couplers for tiny leaks that won’t show up until the decay test.
Skip the manifold gauge for verification entirely. Analog compound gauges bottom out around 3,386 microns, which means anything below 29 inHg is invisible to them. Charging a system based on a manifold gauge reading “deep vacuum” is charging based on a guess.
Pro Tip: Keep a dedicated bench-test log for every pump on the truck. If a pump that used to bench-test at 40 microns starts creeping to 80, that’s your early warning before it fails on a job site and costs you a callback.
The Evacuation Procedure Step by Step
A reliable evacuation isn’t one long pull. It’s a sequence of stages, each with its own target band, and skipping steps is how moisture gets left behind.
- Bulk removal. Pull the system down past 5,000 microns to clear the bulk of the air.
- Intermediate stage. Continue to 1,000 to 2,000 microns, then break vacuum with dry nitrogen to 3 to 5 PSIG. This is the core of a triple evacuation, and it’s worth doing whenever a system has been open to air, shows signs of moisture, or runs POE oil.
- Repeat the break. Pull down again, break with nitrogen again. Two breaks after the initial pull typically qualifies as a full triple evacuation.
- Finish to target. Pull the final stage down to your system’s target, whether that’s 500, 250, or a manufacturer-specified number for ultra-low-temp equipment.
Once you hit target, isolate the pump and watch the gauge. This decay, or standing-vacuum, test is the real pass/fail moment:
- Isolate the pump using the core tool valve or a ball valve rather than shutting the pump off.
- Watch the reading for a minimum of 10 minutes, adding roughly 1 minute per ton of system capacity.
- A reading that holds steady well below the acceptable threshold, generally under 1,000 microns for mineral-oil systems, confirms the system is dry and tight.
- A reading that climbs continuously without leveling off points to a leak somewhere in the circuit.
Write down the finishing micron number, the decay hold time, and how the reading behaved during that window. That record matters if a compressor fails under warranty two years later and someone asks whether the system was evacuated properly.
Reading a Stalled Evacuation Correctly
Not every stall means the same thing, and guessing wrong wastes an afternoon. Learning to read the curve is the difference between a five-minute fix and a callback.
- Continuous fast rise during decay: This is a leak. Isolate sections of the rig, including hoses and cores, to find it.
- Slow rise that levels off: This usually means outgassing or residual moisture rather than a leak, and it often resolves with another evacuation cycle.
- Stall between roughly 3,500 and 4,500 microns: This pattern often points to frozen moisture, since water can freeze and sublimate slowly at that pressure range rather than boiling off.
When you hit a stall, apply gentle heat to suspect sections such as the evaporator or long line runs, then repeat the triple evacuation. If the pump still can’t get below 500 microns on the bench after an oil change, the pump itself is the problem, not the system. For complex VRF/VRV layouts or ultra-low-temp equipment that won’t cooperate, check the leak detection methods available to you and don’t hesitate to call the manufacturer’s technical line. Some of these systems have evacuation quirks that aren’t obvious from general HVAC training.
Pro Tip: If two different sections of a rig both show slow decay, don’t assume two leaks. Swap the gauge to the other section first. Sometimes it’s one bad hose fitting getting blamed twice.
How Hvac-prime Supports a Proper Evacuation
Getting these numbers right depends on equipment that performs the way the spec sheet claims. A vacuum pump sized correctly for the job matters just as much as the gauge you pair it with, since an undersized pump on a large VRF system will chase a target for hours it should hit in minutes.
Hvac-prime’s HVAC tools category covers the gauges and pumps that make bench-testing and field verification straightforward, and the manifold and vacuum pump listings give technicians a reference point for what a properly matched setup looks like. For commercial and low-temp refrigeration work with tighter targets, the commercial refrigeration category rounds out the toolkit with equipment built for those harder jobs.
What Actually Separates Good Evacuations From Bad Ones
Chasing a specific micron number is the easy part. Any tech can watch a gauge and stop pulling when the digits look right. What separates a defensible evacuation from a lucky one is whether you ran the decay test and wrote down what happened.
I’d rather see a tech finish at 600 microns with a clean 15-minute decay hold than one who hits 400 microns and never checks whether it climbs back to 2,000 the moment the pump valve closes. The number without the hold test is a snapshot, not proof. Always check the manufacturer’s literature on warranty-sensitive or ultra-low-temp equipment before assuming a generic target applies, and keep your pump and gauge validated between jobs rather than after something goes wrong.
— Planet
Get the Right Tools for a Clean Evacuation
Skip the equipment gap that turns a solid procedure into a guessing game. Hvac-prime stocks the micron gauges and vacuum pumps technicians actually need to bench-test before a job and verify after one, plus the hose kits and diagnostic accessories that keep a decay test honest.

For a typical residential call, that means a dedicated micron gauge, a pump sized to the system’s line length, and a clean hose set with tight cores. For POE-oil or VRF work, pair that same setup with the correct refrigerant on hand so you can move straight from a passed decay test into charging without a second truck run. Browse the current tool lineup and order what your next job requires before you’re standing in a driveway short a fitting.
Sources
For deeper reading on targets, decay-test timing, and pump validation, see HVAC School’s evacuation guide, Skillcat on micron gauge use, and Fieldpiece on vacuum gauge basics.
- How long should I evacuate a system? – HVAC School
- Micron gauge use and interpreting evacuation curves – Skillcat
- Understanding vacuum level measurements – ACHR News
FAQ
Is 5,000 Microns a Good Finishing Vacuum?
No. At 5,000 microns you’ve removed most of the air, roughly 99.34% of degassing, but you haven’t done meaningful dehydration yet. Treat 5,000 microns as a checkpoint, not a finish line.
Why Won’t My Vacuum Pull Below 1,000 Microns?
A stall around 1,000 microns or higher usually means a leak, contaminated pump oil, or a bad hose connection. Bench-test the pump alone first; if it clears 100 microns on the bench but not on the system, the problem is the rig or a leak, not the pump.
How Many Microns Is a Good Vacuum for HVAC Work?
For standard residential systems, 500 microns or below is the accepted target; POE-oil and VRF systems should reach 250 microns or lower. Ultra-low-temperature refrigeration often needs a manufacturer-specified target as low as 20 to 50 microns.
How Many Inches of Vacuum Is 500 Microns?
500 microns converts to roughly 0.020 inches of mercury below a perfect vacuum. That resolution is too fine for an analog manifold gauge to display accurately, which is why a dedicated micron gauge is required for verification.
What Does a Failed Decay Test Look Like?
A failed decay test shows a continuous, uninterrupted rise in microns after the pump isolates, rather than a reading that levels off. That pattern points to a leak somewhere in the system or fittings, not normal outgassing.




 HVAC
HVAC Automotive
 Refrigerant Diagnostics Kit
 Water Heaters