
HVAC PM Checklist: Technician and Facility Manager Guide

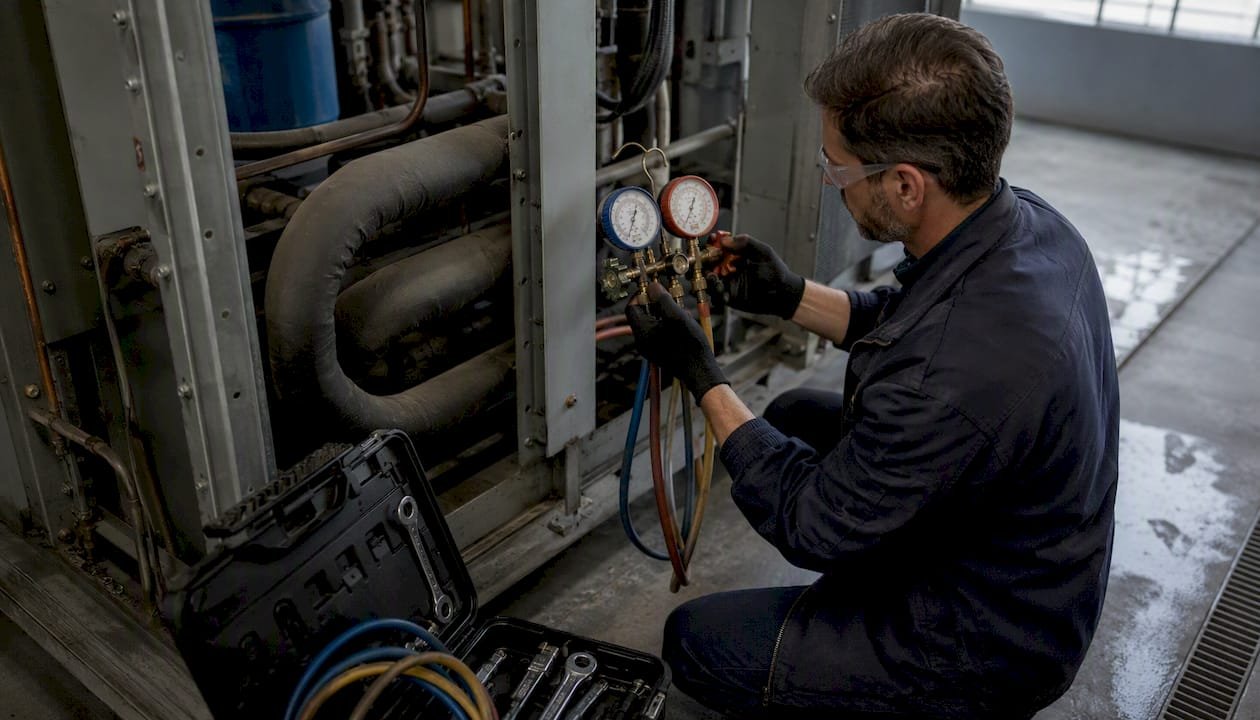
Perform these 10 PM tasks on every maintenance visit to prevent failures, cut energy waste, and extend equipment life: replace or inspect air filters, clean condenser and evaporator coils, check refrigerant levels and test for leaks, clear and test condensate drain lines, inspect electrical connections and measure amp draw, check belts and drive components, verify airflow and inspect ductwork, test thermostats and controls, lubricate motors and bearings, and run pre- and post-maintenance safety checks. Structured PM programs can reduce emergency call-outs by roughly 65% and extend major equipment life by 30–40%, according to industry-cited figures. Download the printable one-page checklist (PDF) and frequency summary below, then use the component-by-component sections to guide each visit.
Quick frequency summary:
- Monthly: Filter inspection, condensate drain check, visual safety walkdown
- Quarterly: Coil inspection, belt tension, electrical check, thermostat test, lubrication
- Biannual (spring/fall): Full coil cleaning, refrigerant check, airflow and duct inspection, controls calibration
- Annual: Deep-dive inspection of all components, refrigerant recovery/recharge if needed, boiler/heating system service, full recordkeeping audit
Printable checklist: Use the log template in the Recordkeeping section to print a one-page field sheet. Bring it on every visit, fill in measured values, and file it with the work order.
Key Takeaways
| Point | Details |
|---|---|
| Follow the cadence | Monthly filter checks, quarterly electrical and belt inspections, biannual coil cleaning, and annual deep-dives keep failures predictable. |
| Record measurements, not checkboxes | Log amps, pressures, temperatures, and filter differential at every visit to catch degrading equipment before it fails. |
| Know the certification line | Refrigerant recovery, sealed-circuit work, and combustion equipment inspection require EPA Section 608 certification — never skip this boundary. |
| Stock before the visit | Standardize filter sizes, keep common refrigerant types on hand, and carry a calibrated clamp meter and differential pressure gauge on every PM truck. |
| Hvac-prime supplies the kit | Virgin refrigerants, professional gauges, vacuum pumps, and certified service bookings are available at Hvac-prime for contractors and facility teams. |
Table of Contents
- What does a complete HVAC PM checklist cover by component?
- How often should each PM task be scheduled?
- Which tasks can your team handle and which require a certified tech?
- What safety checks and compliance steps belong on every PM visit?
- What tools and consumables should every PM kit contain?
- How should you record PM data and what metrics should you track?
- What problems do PM visits commonly uncover and how do you respond?
- Why the checklist matters more than the visit frequency
- Stock your PM kit with Hvac-prime refrigerants and professional tools
- Sources
What does a complete HVAC PM checklist cover by component?
Preventive maintenance for commercial HVAC equipment is most effective when organized by component rather than by a generic task list. The tables below give you the inspection steps, measurement fields, and acceptance thresholds for each major system. Record actual values, not just pass/fail — trending measured readings are what catch degrading equipment before it fails.
Air handling units and rooftop units (AHU/RTU)
Condenser unit and chiller
| Task | Measurement field | Pass | Action | Critical |
|---|---|---|---|---|
| Clean condenser coil fins | Visual/airflow | Clean, fins straight | Light fouling | Heavy fouling, bent fins |
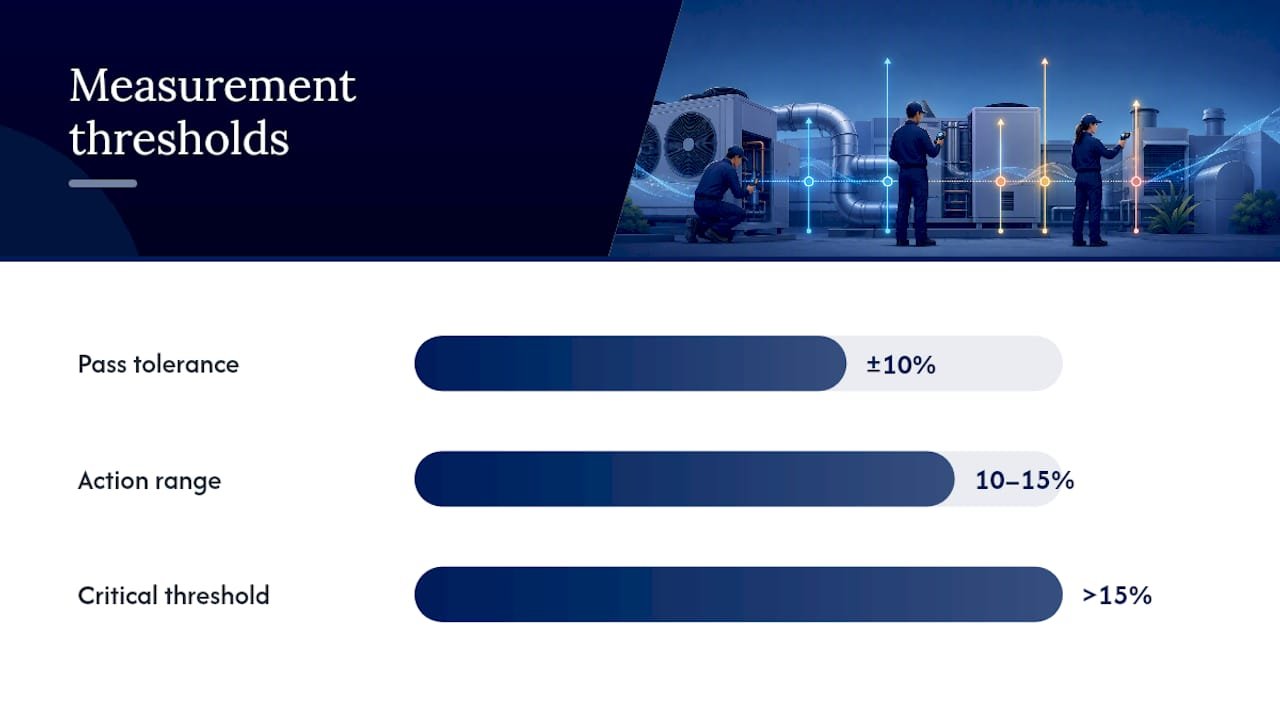
| Measure condenser fan amp draw | Amps (A) | Within nameplate ±10% | ±10–15% | >15% above nameplate |
| Check refrigerant pressures | Suction/discharge (psig) | Per refrigerant PT chart | ±10% of target | >15% deviation |
| Inspect condenser fan blades | Visual | No cracks, balanced | Minor vibration | Cracked blade, severe vibration |
| Check refrigerant for leaks | Electronic leak detector | No leak detected | Trace (small annual loss) | Active leak |
Evaporator coil
| Task | Measurement field | Pass | Action | Critical |
|---|---|---|---|---|
| Inspect coil for fouling and ice | Visual | Clean, no ice | Light fouling | Ice formation, heavy fouling |
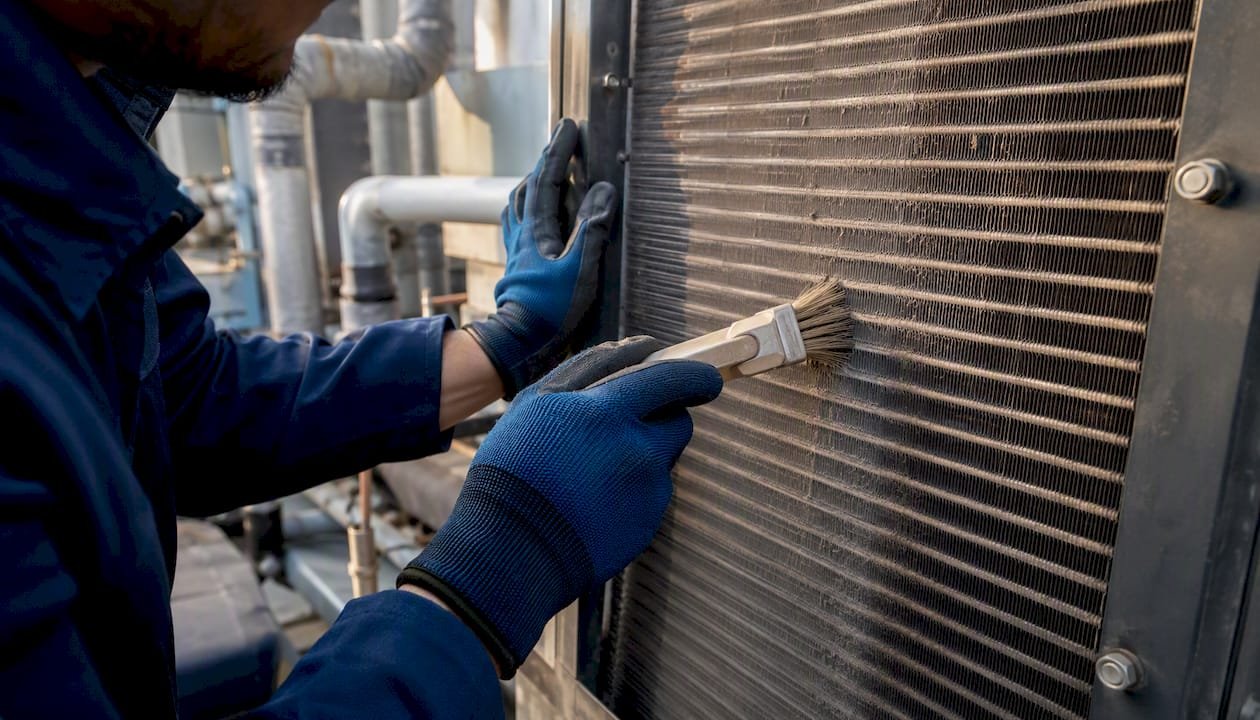
| Clean coil (biannual) | Visual post-clean | Clean fins, no debris | Residual fouling | Blocked airflow |
| Check coil drain pan | Visual | Dry between cycles | Slow drain | Standing water, mold |
Electrical components
| Task | Measurement field | Pass | Action | Critical |
|---|---|---|---|---|
| Inspect wiring and terminals | Visual/torque check | Tight, no discoloration | Minor corrosion | Burned insulation, loose terminals |
| Measure compressor amp draw | Amps (A) | Within nameplate ±10% | ±10–15% | >15% above nameplate |
| Check capacitors | Microfarads (µF) | Within ±6% of rating | ±6–10% | >10% deviation |
| Test contactors and relays | Visual/ohm check | Clean contacts | Pitting | Burned contacts |
| Verify disconnect and breaker | Visual | Properly rated, closed | Loose connection | Tripped, damaged |
Controls and thermostats
| Task | Measurement field | Pass | Action | Critical |
|---|---|---|---|---|
| Calibrate thermostat/BAS setpoints | Temperature offset (°F) | ±1°F | ±1–3°F | >3°F offset |
| Test economizer operation | Damper position/airflow | Modulates correctly | Sticking | Stuck open or closed |
| Verify safety controls (high-pressure, low-pressure, freeze stat) | Setpoint test | Trips at setpoint | ±5% of setpoint | Does not trip |
Boilers and heating systems
| Task | Measurement field | Pass | Action | Critical |
|---|---|---|---|---|
| Inspect heat exchanger | Visual/CO test | No cracks, low CO level | Moderate CO level | CO >35 ppm or visible crack |
| Check flue gas and venting | Visual/CO analyzer | Clear, no blockage | Partial blockage | Blocked, backdraft |
| Test safety relief valve | Manual test | Lifts and reseats | Slow to reseat | Does not lift or leaks |
| Inspect burner and ignition | Visual/flame signal | Clean, stable flame | Weak signal | No ignition |
Ventilation and ductwork
| Task | Measurement field | Pass | Action | Critical |
|---|---|---|---|---|
| Inspect duct insulation and sealing | Visual | No gaps, intact insulation | Minor gaps | Open joints, missing insulation |
| Measure supply/return static pressure | Static pressure (in. w.g.) | Per design spec | ±10% of design | >15% deviation |
| Check diffusers and grilles | Visual/airflow | Unobstructed | Partial blockage | Fully blocked |
| Inspect dampers | Visual/actuator test | Full travel | Sticking | Seized |
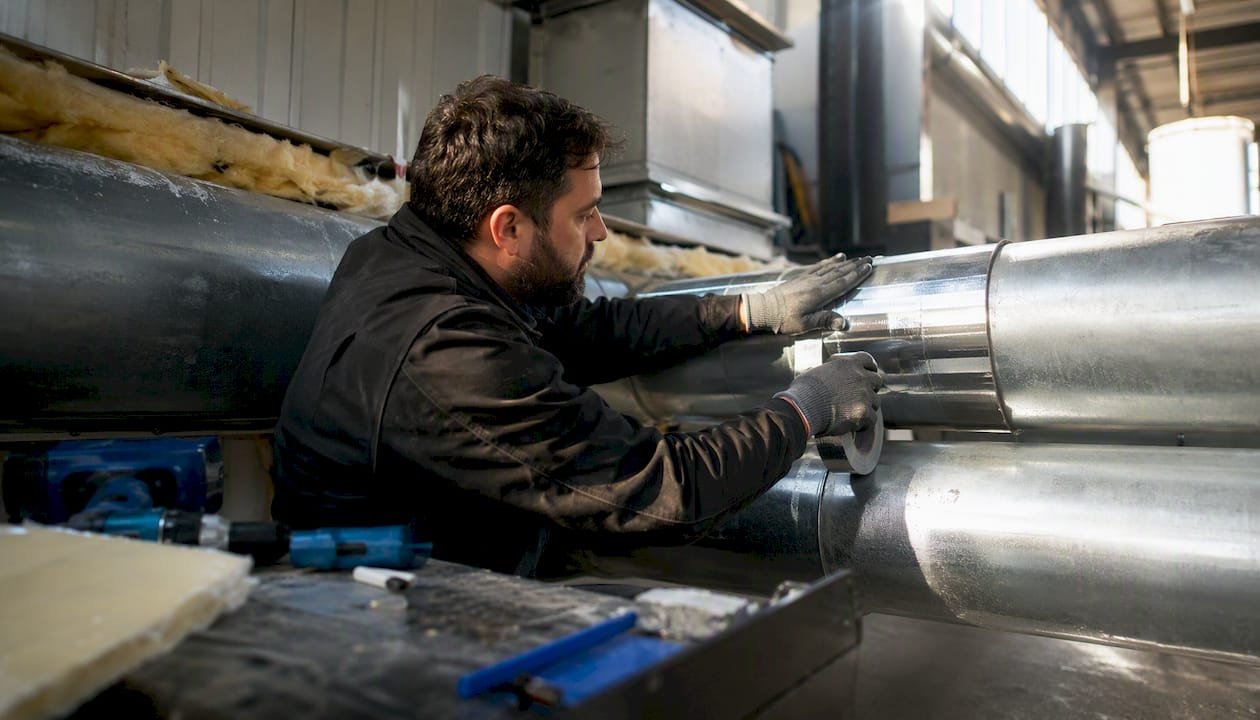
For ventilation work in metal structures, metal building ventilation considerations differ from standard construction — pay attention to thermal bridging and condensation risk at duct penetrations.
Pro Tip: Photograph every Action or Critical finding before and after remediation, then attach the images directly to the work order. A photo log cuts dispute time in half and gives the next technician instant context on what was found and what was done.
How often should each PM task be scheduled?
Routine tasks like cleaning condenser coils, replacing air filters, and checking refrigerant levels are the backbone of any HVAC service schedule, but the right cadence depends on equipment type, run hours, and environment. Structured PM programs follow three pillars: routine inspections, seasonal changeovers, and an annual deep-dive, staggered so no single visit runs overlong and technician time stays predictable.
Seasonal timing windows:
Spring startup (March–April): Focus on cooling-season readiness. Clean condenser coils, verify refrigerant charge, test economizers, calibrate cooling setpoints, and flush condensate lines after winter. Target completion before outdoor temps consistently exceed 65°F.
Summer mid-season (July): A quick walkdown rather than a full PM. Check filter differential, verify supply air temps, and confirm condensate is draining. Catch problems before peak cooling load hits.
Fall changeover (September–October): Shift focus to heating. Inspect heat exchangers, test burners and ignition, check flue venting, and verify heating setpoints. Drain and winterize any cooling-only equipment in freeze-risk areas.
Winter prep (November): Confirm freeze stats are set, inspect pipe insulation, and verify boiler safety controls. In commercial buildings, check economizer damper seals to prevent cold air infiltration.
Estimated time on site per visit type:
- Quick monthly walkdown: 15–20 minutes per unit
- Quarterly mid-depth PM: 45–60 minutes per unit
- Biannual seasonal changeover: 1.5–2 hours per unit
- Annual deep-dive: 2–4 hours per unit
Use these estimates when scheduling technician routes. A facility with 10 rooftop units needs roughly 20–40 hours blocked for an annual deep-dive, not a half-day.
Which tasks can your team handle and which require a certified tech?
The line between in-house operator tasks and certified-technician work is not just about skill — it is about regulatory compliance and liability. Getting this wrong costs more than a service call.
Operator and in-house technician tasks (no EPA certification required):
- Replace or clean air filters (MERV-rated, standard sizes)
- Visual inspection of belts, pulleys, and drive components
- Check and clear condensate drain lines
- Wipe down accessible coil surfaces (no chemical coil cleaner on sealed systems)
- Test thermostat setpoints and verify BAS schedules
- Measure and record supply/return air temperatures
- Inspect ductwork, insulation, and diffusers visually
- Log motor amp draw with a clamp meter (no panel work)
- Check and tighten accessible electrical terminals (with proper lockout/tagout)
- Lubricate motors and bearings per OEM spec
Tasks requiring a certified HVAC technician:
- Any work involving refrigerant: recovery, recharge, leak repair, pressure testing of sealed circuits
- Compressor replacement or diagnosis beyond amp measurement
- Brazing, soldering, or opening refrigerant lines
- Replacing capacitors, contactors, or control boards
- Flue gas analysis and heat exchanger inspection on combustion equipment
- VFD/drive programming and fault diagnostics
- Any confined-space entry for duct or mechanical room work
EPA Section 608 of the Clean Air Act requires technicians who purchase refrigerants in containers larger than 2 lbs and who work on systems with more than 5 lbs of charge to hold a valid Section 608 certification. Venting refrigerants is illegal regardless of type. Recovery is mandatory before opening any sealed circuit, and the recovered refrigerant must be handled per EPA guidelines. Compliance documentation — certification card, recovery machine records, refrigerant purchase logs — should be kept on file and available for inspection.
Red-flag symptoms that require immediate professional response:
- Strong refrigerant odor or visible oil staining around fittings (active leak, isolate and tag out)
- Compressor overheating or tripping on thermal overload repeatedly
- Tripped breakers that reset and trip again (do not reset a second time without investigation)
- Smoke, burning smell, or discolored wiring
- CO readings above 35 ppm near combustion equipment
- Abnormal vibration or noise from compressor or fan motors
- Ice formation on refrigerant lines or evaporator coil during normal operation
Any of these findings means the unit comes out of service until a certified technician clears it. A temporary fix is not appropriate for these symptoms.
What safety checks and compliance steps belong on every PM visit?
NIOSH guidance on protecting workers during HVAC maintenance identifies respiratory hazards, chemical exposures, and physical risks as the primary concerns for technicians working on HVAC equipment. A pre-maintenance safety checklist is not optional paperwork — it is what keeps technicians out of the hospital.
Pre-maintenance safety checklist:
- Lockout/tagout (LOTO): De-energize all electrical circuits and apply personal locks before opening panels or working on moving parts. Verify zero energy state with a meter before touching terminals.
- Electrical isolation verification: Confirm voltage is absent at the disconnect with a calibrated non-contact tester.
- PPE selection: Minimum for most PM work: safety glasses, cut-resistant gloves, and steel-toed boots. Add a half-face respirator with organic vapor cartridges when working in dusty mechanical rooms or near refrigerant lines. Full-face protection for chemical coil cleaning.
- Gas and refrigerant leak detection: Use an electronic leak detector before opening any access panel on a refrigerant-containing system. Never assume a system is leak-free because it was charged last season.
- Confined-space assessment: Mechanical rooms, rooftop curbs, and large AHU cabinets may qualify as permit-required confined spaces under OSHA 29 CFR 1910.146. Assess before entry; never enter alone.
- SDS review: Pull the Safety Data Sheet for every chemical used on the visit — coil cleaners, refrigerants, lubricants. SDS and TDS documents for refrigerants should be on hand before opening any cylinder.
- CO and flue gas check: On any visit involving combustion equipment, test ambient CO before and after burner operation. A CO reading above 35 ppm in the equipment room requires immediate ventilation and investigation before proceeding.
Refrigerant handling compliance: Under EPA Section 608, technicians must be certified to purchase refrigerants in containers over 2 lbs and to service systems with more than 5 lbs of charge. Venting any refrigerant — including older R22 or newer HFCs like R410A — is a federal violation with civil penalties. Always use a certified recovery machine, log the amount recovered, and retain records. When purchasing refrigerant cylinders, verify the refrigerant type matches the system nameplate exactly; cross-contamination from a wrong refrigerant charge can destroy a compressor.
Post-maintenance safety verification:
- Confirm all panels are reinstalled and fastened before re-energizing
- Remove all personal locks in reverse order of application
- Verify system starts normally and reaches setpoint within expected time
- Check for refrigerant odor or unusual sounds after startup
- Record all findings, measurements, and refrigerant added before leaving the site
ENERGY STAR’s maintenance checklist recommends annual inspections that include thermostat calibration and filter replacement as baseline steps for protecting both efficiency and indoor air quality — a useful public reference for facility managers building a compliance argument for PM budget approval.
What tools and consumables should every PM kit contain?
A well-stocked PM kit is the difference between a one-trip visit and a return call because you left a part behind. Separate your kit into instruments, hand tools, and consumables — and restock consumables after every visit, not before the next one.
Test instruments:
- Manifold gauge set: 4-valve digital manifold compatible with the refrigerants in your fleet (R410A, R32, R454B, R22, R134a). Digital readout with built-in PT chart eliminates manual lookup errors.
- Clamp meter: True-RMS, rated to at least 400A AC, with ±1.5% accuracy or better. Fluke 376 FC or equivalent. Measure motor amps at every PM visit.
- Thermometer/thermocouple: Dual-input digital thermometer for simultaneous supply and return readings. Resolution of 0.1°F.
- Differential pressure gauge: Range of 0–2.0 in. w.g. for filter monitoring; 0–10 in. w.g. for duct static pressure. Pressure-differential monitoring is more accurate than calendar-based filter replacement and reduces both energy waste and unnecessary change-outs.
- Electronic refrigerant leak detector: Heated diode or infrared sensor, sensitivity to 0.1 oz/year or better. Calibrate per manufacturer schedule.
- Refrigerant identifier/analyzer: Confirms refrigerant type before connecting gauges — critical when servicing mixed fleets or older equipment that may have been cross-charged.
- CO analyzer: Electrochemical sensor, range 0–999 ppm, for combustion equipment checks.
- Vacuum pump: Two-stage, 7 CFM or larger for commercial work. Pull to 500 microns or below and hold for 15 minutes before charging.
- Micron gauge: Required to verify vacuum depth. A manifold gauge alone cannot confirm a proper vacuum.
Hand tools:
- Torque screwdriver and hex key set for panel fasteners and terminal blocks
- Adjustable wrench and refrigerant service valve wrenches
- Wire brush and coil fin comb for condenser fin straightening
- Flashlight or headlamp (hands-free)
- Inspection mirror
Consumables to stock:
- Air filters: MERV 8 for standard commercial applications, MERV 13 for healthcare or sensitive environments. Standardize filter sizes across your building portfolio to reduce SKU count and simplify ordering.
- Refrigerant cylinders: stock the top two or three refrigerant types in your fleet. Virgin refrigerants from a certified supplier with SDS documentation on hand.
- Lubricating oil: manufacturer-specified type for each motor and compressor brand in your fleet
- Coil cleaner: non-acid foaming cleaner for evaporator coils; alkaline cleaner for condenser coils (check SDS before use)
- Condensate drain treatment tablets
- Replacement belts: keep one spare in the most common cross-section for your equipment fleet
- Capacitor assortment: common µF ratings for the units you service most frequently
- Wire nuts, terminal connectors, and heat-shrink tubing
Pro Tip: Standardize filter sizes across your building portfolio wherever possible. A facility running six different filter dimensions ties up cash in slow-moving inventory and guarantees a stock out on at least one size every quarter. Even one consolidation — say, converting two similar-sized units to the same frame size during a filter-rack upgrade — pays back in procurement simplicity within a year.
For facilities with ductwork in metal building construction, keep extra duct sealant and foil tape in the kit. Metal buildings experience more thermal expansion at duct joints than conventional construction, and those joints open up faster than most PM schedules anticipate.
How should you record PM data and what metrics should you track?
Recording actual measured values at every visit is what separates a PM program from a checkbox exercise. Industry guidance recommends logging measured values — amps, temperatures, pressures — rather than pass/fail only, because trending those numbers reveals degradation patterns weeks or months before a failure shows up as a symptom.
PM log template: field list
Use these fields on every visit. Print as a one-page field sheet or enter directly into your CMMS.
| Field | Unit / format | Notes |
|---|---|---|
| Equipment ID | Alphanumeric | Matches asset register |
| Location / building | Text | Floor, zone, or rooftop grid ref |
| Technician name | Text | Full name for accountability |
| Date / time | MM/DD/YYYY HH:MM | 24-hour preferred |
| Run hours (meter) | Hours | Record from hour meter if installed |
| Filter type | MERV rating + dimensions | e.g., MERV 13, 20×20×2 |
| Filter differential pressure | in. w.g. | Measured, not estimated |
| Supply air temperature | °F | Measured at supply plenum |
| Return air temperature | °F | Measured at return plenum |
| Delta-T (supply–return) | °F | Calculated from above two fields |
| Suction pressure | psig | At service port |
| Discharge pressure | psig | At service port |
| Superheat | °F | Calculated from suction temp and pressure |
| Subcooling | °F | Calculated from liquid line temp and pressure |
| Refrigerant added | oz or lbs | Zero if no addition; log refrigerant type |
| Compressor amp draw | A | Per phase if 3-phase |
| Blower motor amp draw | A | Compare to nameplate |
| Condenser fan amp draw | A | Compare to nameplate |
| Findings (per item) | Pass / Action / Critical | One row per checklist item |
| Photo attachments | File reference | Required for Action and Critical findings |
| Next recommended action | Text | Work order number if generated |
| Technician signature | Text / digital | Required for compliance records |
KPIs to trend at unit and portfolio level
- Filter differential pressure trend: A rising ΔP baseline between change-outs indicates either undersized filters, increased particulate load, or a blower issue. Pressure-based filter replacement outperforms calendar scheduling in both energy cost and filter life.
- Motor amp trend: A motor drawing progressively more amps over successive PM cycles is heading toward failure. Flag any unit where amp draw increases more than 5% between quarterly visits.
- Delta-T across coil: A shrinking delta-T (less than 15°F on a cooling coil) points to low refrigerant charge, dirty coil, or airflow restriction. Trend it quarterly.
- Refrigerant added per visit: Any unit requiring refrigerant addition at every PM has a leak. Cumulative refrigerant added per unit per year is a direct measure of leak rate and regulatory exposure.
- Action/Critical findings per unit: Units generating repeated Action or Critical findings are candidates for capital replacement, not continued PM spend.
- Emergency call frequency: Track unplanned service calls per unit per year. A unit generating more than two emergency calls annually costs more to maintain than to replace.
Sample log entry: Unit RTU-04, Building B Rooftop, technician J. Martinez, 04/15/2026 09:30. Filter: MERV 13, 24×24×2, ΔP = 0.72 in. w.g. (Action — replaced). Supply air 54°F, return air 74°F, delta-T 20°F (Pass). Suction 118 psig, discharge 285 psig (Pass, R410A). Superheat 10°F, subcooling 12°F (Pass). Refrigerant added: 0 oz. Compressor amps: 18.2A (nameplate 18.5A, Pass). Blower amps: 6.1A (nameplate 6.0A, Pass). Findings: filter replaced, all other items Pass. Photo: filter condition pre-change attached. Next action: none. Signature: J. Martinez.
Retain PM records for a minimum of three years. Many equipment warranties and commercial insurance policies require documented PM history to honor claims — a missing log entry can void a $15,000 compressor warranty.
Pro Tip: If your team is still using paper logs, scan and file them the same day as the visit. A log sitting in a truck for two weeks is effectively lost. Better: move to a CMMS or even a shared spreadsheet with a standardized template so every technician enters data in the same format and trending becomes a filter sort, not a manual comparison.
What problems do PM visits commonly uncover and how do you respond?
PM visits surface problems that would otherwise become emergency calls. The difference between a $200 filter replacement and a $6,000 compressor replacement is often one missed quarterly visit.
-
Restricted airflow from a clogged filter. Symptom: High filter differential pressure, low supply airflow, rising return air temperature, compressor short-cycling. Immediate fix: Replace filter, verify blower amp draw returns to normal. Next step: Check if the replacement interval is too long for this location’s particulate load; adjust schedule or switch to pressure-differential monitoring. Safety: No shutdown required unless compressor is tripping on low-pressure lockout.
-
Dirty condenser coil. Symptom: High discharge pressure, elevated compressor amps, reduced cooling capacity, compressor tripping on high-pressure cutout. Immediate fix: Clean coil with appropriate coil cleaner, straighten bent fins. Next step: Check cleaning frequency; outdoor coils in dusty or high-pollen environments may need quarterly cleaning rather than biannual. Safety: De-energize unit before applying chemical cleaner; rinse thoroughly before restart.
-
Refrigerant leak (low charge). Symptom: Low suction pressure, high superheat, reduced delta-T, possible ice on suction line. Immediate fix: Do not add refrigerant without finding and repairing the leak first. Tag the unit, generate a corrective maintenance work order, and schedule a certified technician for leak search and repair. Safety: If a strong refrigerant odor is present, evacuate the area and ventilate before proceeding. Venting refrigerant is a federal violation — recovery is mandatory.
-
Condensate drain blockage. Symptom: Standing water in drain pan, water staining on ceiling tiles below AHU, high humidity readings, possible mold odor. Immediate fix: Clear the drain with a wet/dry vacuum or CO2 purge, flush with water, add condensate treatment tablet. Next step: Inspect drain pan for mold growth; if present, clean with an EPA-registered disinfectant and document. Safety: Mold remediation beyond surface cleaning requires appropriate respiratory protection.
-
Worn or slipping belt. Symptom: Squealing noise, reduced airflow, belt dust on blower housing, elevated blower motor amps. Immediate fix: Replace belt with correct cross-section and length, set tension per OEM spec. Next step: Check sheave alignment and condition; a misaligned sheave will destroy a new belt within weeks. Safety: De-energize and LOTO before opening blower access panel.
-
Failing capacitor. Symptom: Motor slow to start, humming on startup, motor overheating, compressor or fan not starting. Immediate fix: Discharge capacitor before handling (stored charge can cause serious injury), replace with correct µF rating and voltage rating. Next step: Check motor windings for damage if the capacitor has been failing for an extended period. Safety: Capacitor discharge is mandatory — use an insulated resistor, not a screwdriver.
-
High CO reading near combustion equipment. Symptom: CO analyzer reads above 35 ppm in equipment room or supply air. Immediate fix: Remove equipment from service immediately. Ventilate the space. Do not restart until a certified technician has inspected the heat exchanger, burner, and flue. Safety: This is a life-safety issue. CO above 35 ppm in occupied spaces requires building notification and potentially evacuation per OSHA and NIOSH guidance.
-
Tripped breaker or overloaded circuit. Symptom: Unit not running, breaker in tripped position. Immediate fix: Identify the cause before resetting. Check for locked-rotor condition, short circuit, or ground fault with a clamp meter and insulation tester. Reset once only after confirming no fault. Next step: If breaker trips again, tag out and generate a corrective work order. Safety: Never reset a breaker more than once without investigation. A second trip means a fault is present.
Converting PM findings to work orders: Any Action finding that cannot be resolved during the PM visit becomes a corrective maintenance work order before the technician leaves the site. Critical findings generate a work order with a same-day or next-business-day SLA. Facilities with a CMMS should link the PM record to the corrective work order so the repair history stays with the asset.
Why the checklist matters more than the visit frequency
Most PM programs fail not because the schedule is wrong but because the checklist is vague. “Inspect coils” on a paper form tells a technician nothing about what to measure, what threshold triggers action, or what to record. A technician who checks a box without measuring anything has not performed a PM — they have performed a walkthrough.
The shift that actually changes outcomes is moving from binary pass/fail to recorded measurements with defined thresholds. A compressor drawing 18.2A this quarter and 19.8A next quarter is telling you something. A filter differential that climbs from 0.4 to 0.7 in. w.g. between monthly checks in a facility that used to run 0.3 in. w.g. is telling you the particulate load changed — maybe a nearby renovation, maybe a failed pre-filter upstream. You cannot see that trend on a checkbox.
The BLS occupational data for HVAC mechanics and installers confirms that PM work is a core technician responsibility, not a junior task. Treating it that way — assigning experienced technicians, giving them proper instruments, and requiring measured readings — is what separates a PM program that prevents failures from one that just documents them after the fact.
One more thing worth saying plainly: the most expensive PM task is the one that gets skipped because the schedule slipped. A missed biannual coil cleaning costs roughly $150 in labor. The compressor failure it eventually causes costs $3,000–$8,000 in parts and emergency labor, plus lost cooling during the hottest week of the year. The checklist is not the goal. Consistent execution of the checklist is.
Stock your PM kit with Hvac-prime refrigerants and professional tools
Every task on this checklist requires the right materials on the truck before the visit starts. Hvac-prime supplies virgin refrigerant cylinders across the full range technicians need today: R22, R410A, R32, R454B, R134a, R404A, R407C, R448A, R449A, and R1234yf, all with SDS documentation included. Wholesale pricing and fast shipping mean you are not waiting a week for a cylinder when a unit is down.
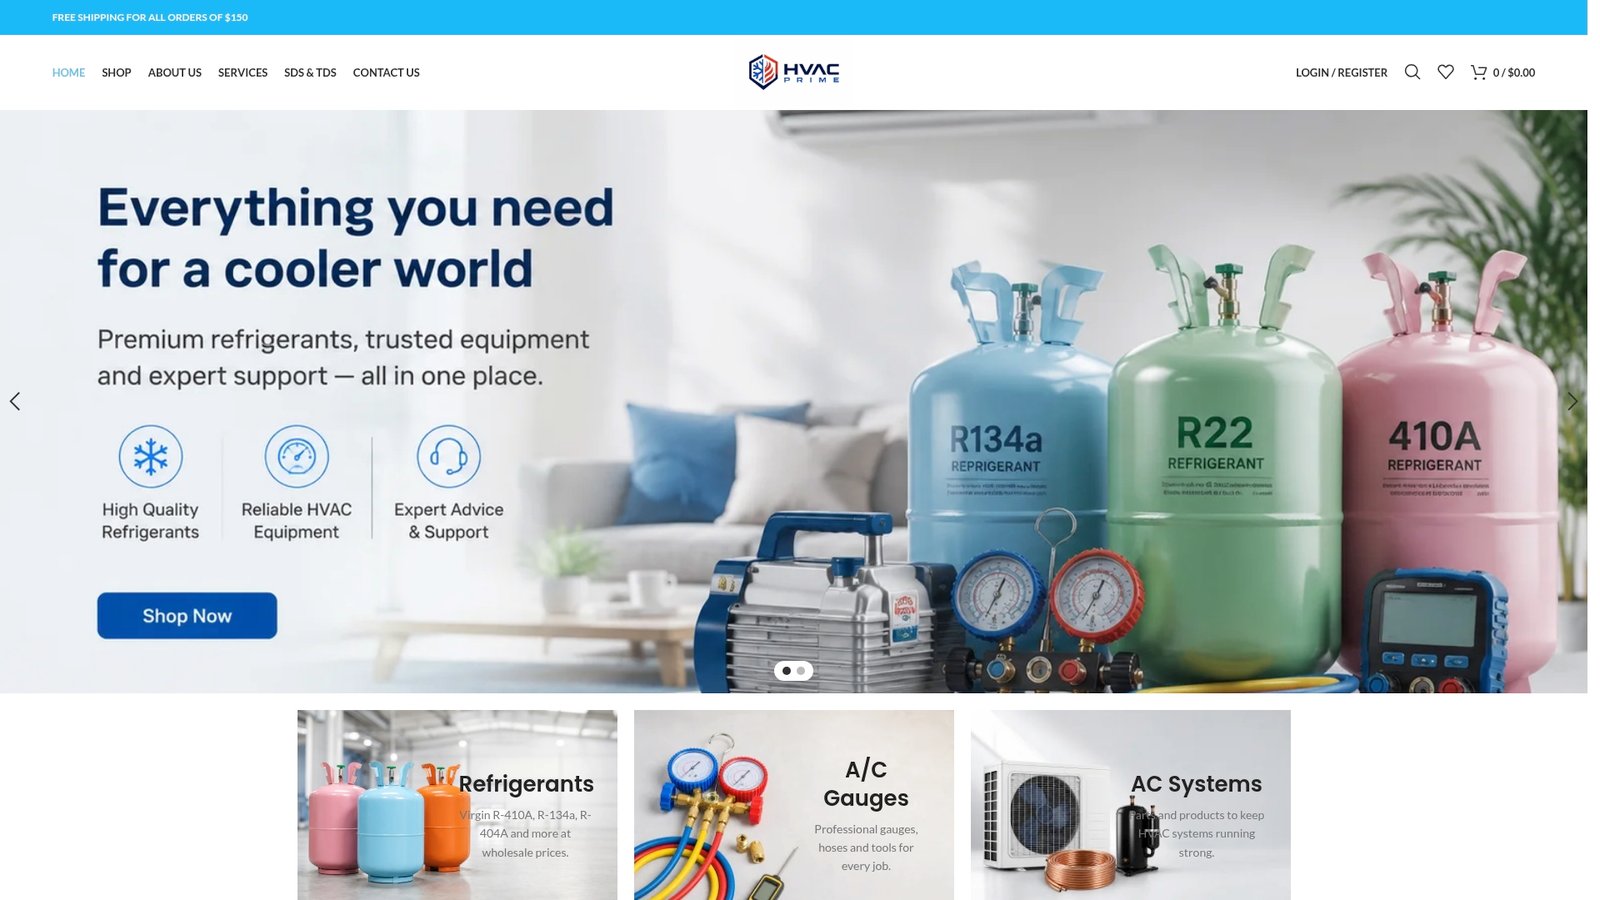
For the instrument side of your PM kit, Hvac-prime carries professional-grade HVAC tools including manifold gauge sets, vacuum pumps, refrigerant analyzers, and diagnostic kits built for field use. Every refrigerant purchase requires proper Section 608 certification — Hvac-prime verifies credentials at checkout and provides SDS access so your compliance documentation stays current. For certified technician bookings and maintenance services, visit the HVAC Prime services page to schedule a visit or request a quote.
Sources
The following authoritative sources were used to build this checklist. Consult them directly for regulatory detail, energy-efficiency guidance, and safety requirements.
- Preventative maintenance for commercial HVAC equipment — Better Buildings Solution Center
- Heating and cooling maintenance checklist — ENERGY STAR
- Heating, Air Conditioning, and Refrigeration Mechanics and Installers — Occupational Outlook — BLS




 HVAC
HVAC Automotive
 Refrigerant Diagnostics Kit
 Water Heaters
4 thoughts on “HVAC PM Checklist: Technician and Facility Manager Guide”