
Two Minute Vacuum Pump Oil Check for HVAC Techs

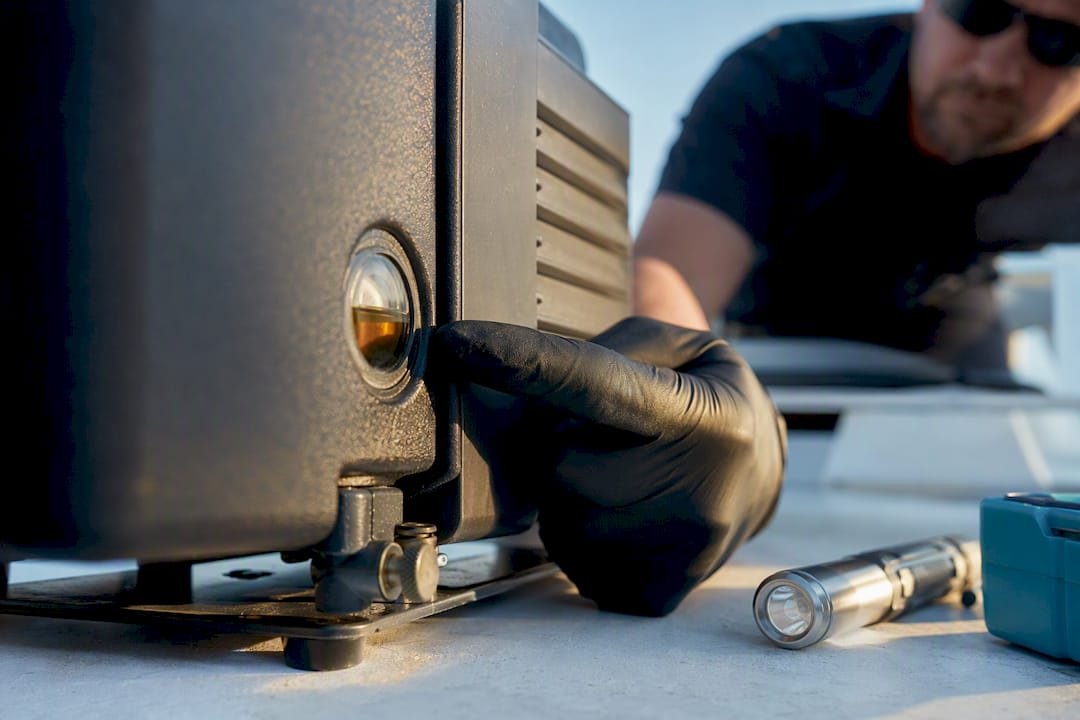
Change vacuum pump oil when the sight glass shows dark, cloudy, or milky fluid, or when the pump can’t pull down to its rated micron level, whichever comes first. Skip the calendar and trust the oil’s condition and the pump’s performance instead. For heavy contamination, run a warm drain, flush with a partial refill, and repeat until the drained oil comes out clean, then refill with the oil your manufacturer specifies.
TL;DR:
- Regularly inspecting the sight glass for dark, cloudy, or foamy oil and replacing it before performance drops ensures optimal pump sealing and vacuum levels.
- Contaminated oil with flakes, residue, or abnormal color indicates additive exhaustion or moisture ingress, requiring immediate changes or system flushing.
- Synthetic oils are preferable in demanding conditions for better thermal stability and longer intervals, especially in pumps handling deep vacuum or aggressive vapors.
- Keeping a detailed maintenance log of oil condition, hours run, and actions taken helps identify patterns and prevents premature failures.
- Using external filters and separators extends oil life and reduces flush frequency, especially when pumping condensable vapors or dusty environments.
Table of Contents
- Quick Vacuum Pump Oil Management Checklist for Routine Rounds
- How Vacuum Pump Oil Works: Sealing, Cooling, and Trapping Contaminants
- How to Spot Vacuum Pump Oil Contamination Before It Costs You
- Choosing the Right Vacuum Pump Oil for the Job
- Building a Condition-Based Oil Change Schedule
- Vacuum Pump Oil Change and Flush Procedure, Step by Step
- Maintenance Logs and Filtration That Extend Vacuum Pump Oil Life
- What I’d Prioritize First on a Busy Shift
- Stock the Right Oil and Tools Before You Need Them
- Sources
Quick Vacuum Pump Oil Management Checklist for Routine Rounds
You don’t need a lab to catch most oil problems. A two-minute look at the sight glass during your regular rounds catches the majority of issues before they become downtime.
Run through this on every visit:
- Check sight glass color against a fresh-oil baseline and confirm the level sits between the marked lines.
- Log the pump’s location, model number, and oil condition every time, even when everything looks fine.
- Time the pump-down and listen for knocking, whining, or a labored motor, all of which point to internal wear or oil breakdown.
- If oil looks milky, foamy, or has visible sludge, pull the pump from service rather than running it another shift.
- Lock out and tag out the unit before touching the drain or fill ports. Vacuum pumps hold residual pressure and hot oil that can surprise you.
Pro Tip: Keep a fresh-oil sample in a small clear jar next to your logbook. Comparing drained oil against that reference beats guessing from memory, especially when you’re servicing pumps that run different oils.
How Vacuum Pump Oil Works: Sealing, Cooling, and Trapping Contaminants
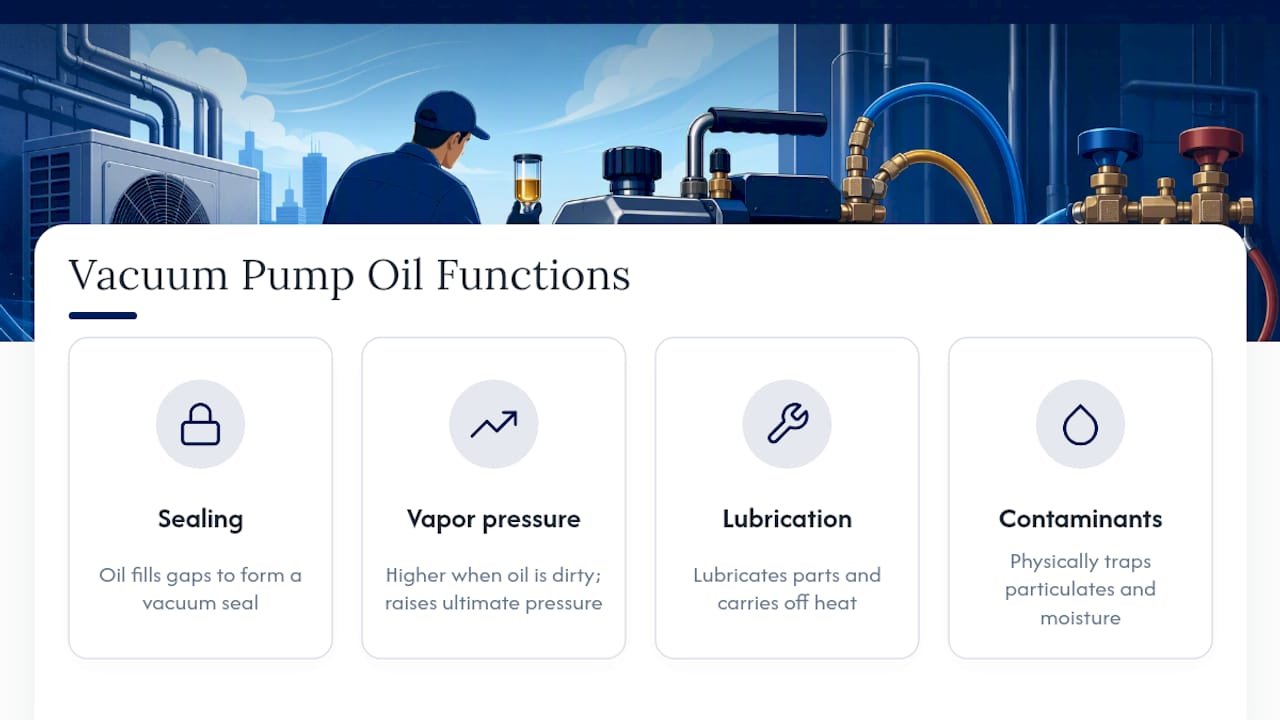
Oil isn’t just lubrication in a vacuum pump. It’s the seal. In a rotary vane or liquid ring pump, oil fills the microscopic gaps between vanes, rotors, and housing walls, creating a dynamic barrier that lets the pump reach deep vacuum levels. Without that film, air leaks past every moving surface and the pump stalls out at a mediocre vacuum no matter how long it runs.
That sealing function is also why oil condition matters more than most techs assume. Contaminated oil has higher vapor pressure than the oil left the factory with, and elevated vapor pressure directly raises the ultimate pressure the pump can achieve. In plain terms: dirty oil vaporizes more readily inside the pump, and that vapor works against you right when you’re trying to pull the system down. The pump doesn’t need to break mechanically to fail at its job. Degraded oil quietly steals performance long before anything seizes or grinds.
Oil also lubricates moving parts, carries heat away from the compression chamber, and physically traps particulates and moisture that would otherwise circulate and score metal surfaces. Different pump applications lean on different oil chemistry to do this well. A pump pulling deep vacuum on a refrigeration system needs an oil with low vapor pressure at operating temperature. A pump exposed to solvent vapors or acidic byproducts needs additives that resist chemical breakdown. Viscosity matters too. Oil that’s too thin loses its sealing film under load; oil that’s too thick drags down startup and increases wear at cold temperatures.
How to Spot Vacuum Pump Oil Contamination Before It Costs You
Oil tells you what’s happening inside the pump if you know how to read the color. Fresh oil runs light and clear, almost like light straw. As it works, it darkens gradually toward amber, then dark red, then black. Manufacturer guidance from Edwards treats a shift to dark red or black as a clear signal that service is overdue, not optional.
Color alone won’t tell you everything, though. Watch for these distinct patterns:
- Milky or foamy oil means moisture has entered the system, either through a leak or from pumping down a wet load. This calls for an immediate oil change, and in persistent cases, a dehydration run before the pump goes back into full service.
- Flakes or grainy residue signal that the additive package has worn out or that the oil has been exposed to something corrosive. Leybold’s service guidance flags this as an additive-exhaustion marker, distinct from simple darkening.
- Stalled micron readings during pump-down, where the gauge won’t drop past a certain point no matter how long you run it, often trace back to oil that’s lost its sealing capacity.
- Overheating on a pump that used to run warm but not hot usually means the oil has thickened, degraded, or dropped below its proper fill level.
Any one of these on its own justifies a look. Two or more together usually means the pump needs attention before its next scheduled job.
Choosing the Right Vacuum Pump Oil for the Job
Mineral oil handles most general-purpose vacuum work fine, and it costs less per gallon than synthetic alternatives. Synthetic oil earns its premium in tougher conditions: it resists thermal breakdown better, holds its chemical stability longer under load, and typically extends the interval between changes when a pump runs hot or handles aggressive vapors.
Vapor pressure should drive your decision more than price. A pump chasing deep vacuum, in the sub-micron range, needs oil with genuinely low vapor pressure, or the oil itself becomes the limiting factor on how low the gauge can read. This is the trap a lot of shops fall into: they buy a capable pump, then feed it a general-purpose oil that caps its performance well above spec.
A few practical selection rules:
- Match oil to the moisture load. If the pump regularly handles wet air or is used for dehydration work, choose a formulation built to resist emulsification.
- For pumps exposed to acidic or corrosive byproducts, pick oil with a corrosion-inhibiting additive package rather than a standard general-purpose blend.
- Always check the pump manual before substituting a generic oil. Leybold’s own selection guidance warns that off-spec oil can cause oxidation and varnish buildup, and running the wrong oil can void your warranty outright.
- When in doubt, stick with the oil the manufacturer names by product line. Our vacuum pump oil selection guide breaks down compatibility by pump type if you’re stocking for a mixed fleet.
Building a Condition-Based Oil Change Schedule
Fixed-interval schedules look tidy on paper, but they either waste oil that’s still good or leave contaminated oil running past the point where it’s already hurting performance. A better approach uses runtime hours as a starting baseline, then adjusts based on what you’re actually seeing in the sight glass.
Rough starting ranges, according to Becker Pumps, run 500 to 2,000 hours for oil-lubricated rotary vane pumps, and 1,000 to 1,500 hours for liquid ring pumps, both depending heavily on operating conditions. Dry and gas-tight pumps vary more since some do not use oil in the compression chamber. Treat these as the point where you start checking more closely, not a trigger for an automatic change.
Several conditions shorten those intervals fast:
- High ambient humidity or wet process loads accelerate emulsification.
- Corrosive gases eat through additive packages faster than clean, dry air.
- Heavy particulate load from dusty environments contaminates oil mechanically, not just chemically.
- Sustained high operating temperatures speed up thermal breakdown regardless of oil grade.
Gas ballast and oil separators change this math meaningfully. Running gas ballast when pumping condensable vapors helps sweep vapor out before it condenses into the oil, and a properly sized separator keeps particulate and moisture from ever reaching the sump. Pumps running these accessories consistently often go longer between changes than the baseline ranges suggest. Log hours and condition together, and let the oil’s actual state override the hour count when they disagree.
Vacuum Pump Oil Change and Flush Procedure, Step by Step
- Gear up and lock out. Put on eye protection and oil-resistant gloves, then lock out and tag out the pump before opening any drain or fill port.
- Warm the pump. Run it for a few minutes at normal operating temperature. Warm oil flows faster and carries more suspended contaminants out with it than cold, thickened oil.
- Drain into a capture container. Position a sealed container under the drain port, open it fully, and let gravity do the work. Don’t rush this step by tilting the pump or forcing flow; sediment at the bottom of the sump needs time to move.
- Decide if a flush is needed. If the drained oil is heavily discolored, sludgy, or smells burnt, don’t refill straight to spec. Add a partial charge of fresh oil, run the pump briefly at atmosphere to circulate the new oil through the system, then drain again.
- Repeat the flush until clean. Most heavily contaminated pumps need two to three flush cycles before the drained oil comes out close to its original color. Skipping this step just means your fresh charge gets contaminated within the first few hours of use.
- Refill to the correct level. Add oil slowly while watching the sight glass, and stop at the manufacturer’s marked fill line. Overfilling causes foaming and oil carryover into the exhaust; underfilling starves the seal.
- Check for leaks and run a vacuum test. Start the pump, listen for anything abnormal, and confirm it reaches its rated micron level within the expected time.
- Log everything. Record the date, runtime hours at change, oil condition observed, whether a flush was performed, and the vacuum test result.
Pro Tip: If a pump needs flushing more than once every few months, that’s not a maintenance problem, it’s a process problem upstream. Look at what’s entering the pump before assuming the oil is the issue.
Maintenance Logs and Filtration That Extend Vacuum Pump Oil Life
A maintenance log doesn’t need to be complicated to be useful. Three columns cover most of what you need: runtime hours, oil color observed, and any action taken. Over a few months, that simple record reveals patterns that a single inspection never will, like a specific pump that always contaminates faster after a particular job type, or a process upstream that’s introducing more moisture than expected.
External oil separators and inline filtration are worth the investment on any pump that runs condensable vapors regularly. They pull moisture and particulate out before it reaches the sump, which stretches the interval between changes and reduces the frequency of full flush cycles. Combined with gas ballast, filtration often pays for itself within a season on pumps running heavy duty cycles. For dosing amounts, filter housings, and the tools to run a clean oil change on the shop floor, our professional HVAC tools selection covers the accessories techs reach for most.
What I’d Prioritize First on a Busy Shift
If you’re stretched thin, skip the deep dive and do two things consistently: glance at the sight glass and time the pump-down on every unit you touch. Those two checks catch the failures that actually cost you a callback. Log every oil change with the condition you observed, not just the date. Over time, that record tells you which pumps, jobs, or environments are quietly burning through oil faster than they should, which is worth more than any fixed schedule you could set up front.
— Planet
Stock the Right Oil and Tools Before You Need Them
Running out of the correct vacuum pump oil mid-job costs you more than the price of the oil. It costs the callback, the rescheduled service window, and the client’s patience. Hvac-prime stocks manufacturer-grade vacuum pump oils alongside the gauges, hoses, and diagnostic kits techs need for a clean oil change, with fast shipping so a shortage doesn’t turn into a stalled job.
Every product page links out to the SDS and TDS documents your safety files require, so you’re not chasing paperwork after the fact. If you’re overdue for a pump service, browse HVAC tools for oil, funnels, and fittings, or check the Bolton 7 CFM dual-stage vacuum pump if your current unit is due for replacement rather than another rebuild. Place an order today and have what you need on the truck before your next service call.
Sources
- Rotary vane vacuum pump maintenance and oil change – Leybold Ireland
- Fast Evacuation Series: Oil Management – Appion
- How to Change Vacuum Pump Oil the Right Way | Provac Sales, Inc.
- How Often Should You Change the Oil in Your Vacuum Pump? – Becker Pumps
- Servicing rotary vane pumps – Edwards (PDF)




 HVAC
HVAC Automotive
 Refrigerant Diagnostics Kit
 Water Heaters