
The 8-Step Automotive AC Service Procedure Every Tech Should Follow

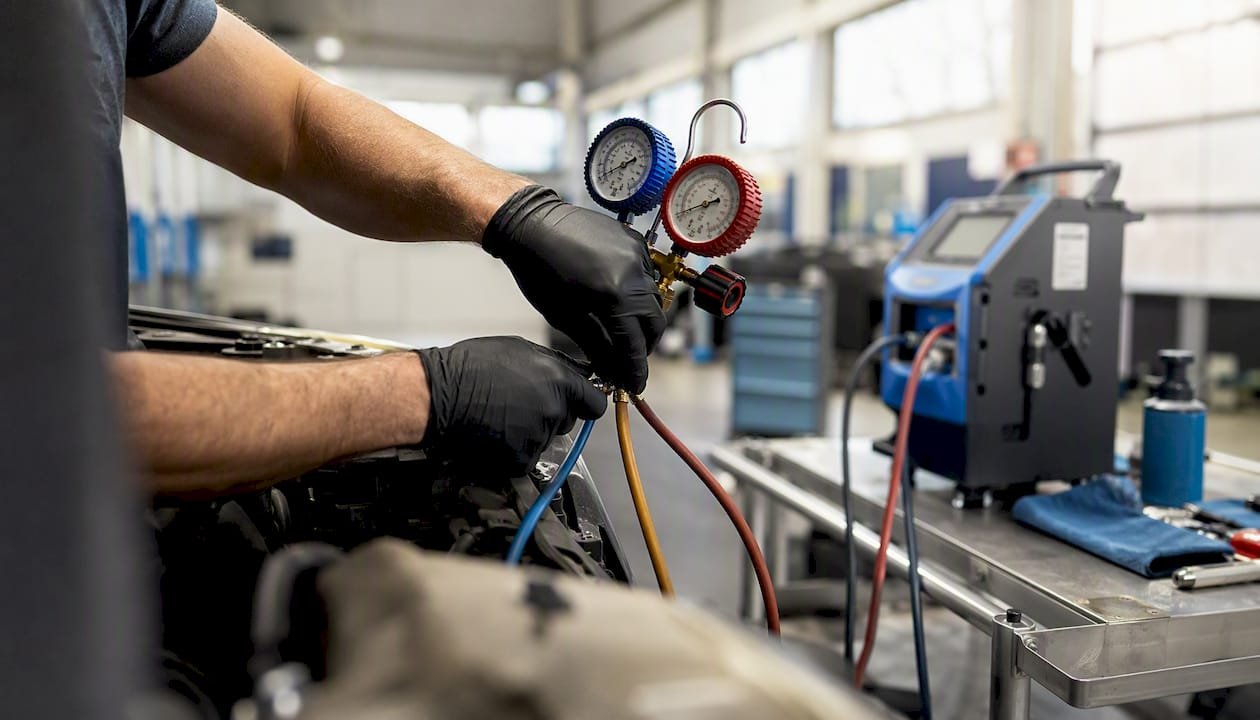
A complete automotive AC service procedure runs through eight steps in order: identify the refrigerant and system type, run pre-service checks, detect leaks, recover the existing charge, measure oil removed, pull vacuum and run a decay test, inject oil and recharge by weight, then verify performance. Skip a step or do them out of order and you get comebacks. Do them right and the car leaves the bay with cold air that stays cold.
That sequence isn’t arbitrary. It mirrors the recovery, vacuum, and recharge routines built into OEM service documentation, including the step sequences Tesla publishes for its Model Y platform, which calls out specific vacuum times, oil measurement, and mass-based charging. The logic transfers to nearly any R-134a or R-1234yf system on the road.
Here’s the checklist in bench-ready form:
- Identify refrigerant type, system label, and service port locations.
- Run pre-service diagnostics: vent temp, clutch engagement, static pressure, filter condition.
- Detect leaks with an electronic sniffer first, then UV dye if needed.
- Recover the existing refrigerant charge with a certified recovery machine.
- Measure and record the oil that comes out during recovery.
- Pull a deep vacuum and run a decay test to confirm the system holds and is dry.
- Inject the correct oil and recharge by weight to OEM spec.
- Verify performance: pressures, vent temperature, and compressor cycling.
One sentence on the law of it: the EPA’s Section 608 regulations require certification to handle refrigerant, and venting it to the atmosphere is illegal regardless of certification status. If the system has a known leak, you repair it before recharging. Adding refrigerant to a leaking system is not a fix, it’s a return visit waiting to happen.
Pro Tip: Keep a laminated pressure/temperature chart at the bench. You’ll reference it more than any other single piece of paper during a service.
Key Takeaways
A correct automotive AC service procedure repairs leaks before recharging, measures oil precisely, and charges refrigerant by weight to OEM spec rather than by feel.
| Point | Details |
|---|---|
| Diagnose before recharging | Never top off a system with a known leak; repair first, since low charge almost always signals a leak. |
| Detect leaks in sequence | Run an electronic detector first, then UV dye for smaller leaks that take up to 90 minutes to show. |
| Measure oil during recovery | Record oil volume removed to calculate the exact amount to inject back during recharge. |
| Vacuum removes moisture, not just air | Run the full vacuum sequence and a decay test before recharging to prevent internal corrosion. |
| Source refrigerant from a reliable supplier | Hvac-prime supplies virgin R-134a, R-1234yf, and bulk R-407C along with the diagnostic tools this procedure requires. |
Table of Contents
- Tools and Safety You Need Before Touching a Service Port
- How Do You Run Pre-Service Checks on a Car AC System?
- What’s the Right Way to Find a Refrigerant Leak?
- Recovering Refrigerant and Measuring the Oil That Comes Out
- Why the Vacuum and Decay Test Step Can’t Be Skipped
- Injecting Oil and Recharging the System by Weight
- How Do You Verify AC Performance After Service?
- When Should You Replace Parts Instead of Just Repairing Them?
- Troubleshooting Checklist for Post-Service Problems
- Stocking Your Shop for Reliable AC Service Work
- Get the Refrigerant and Tools This Procedure Requires
- Frequently Asked Questions
- Sources
Tools and Safety You Need Before Touching a Service Port
You can’t run this automotive AC service procedure correctly with a cheap gauge set and a can of dye from the parts store. The job calls for calibrated equipment, and skipping that step is how techs misdiagnose a healthy system as a bad one.
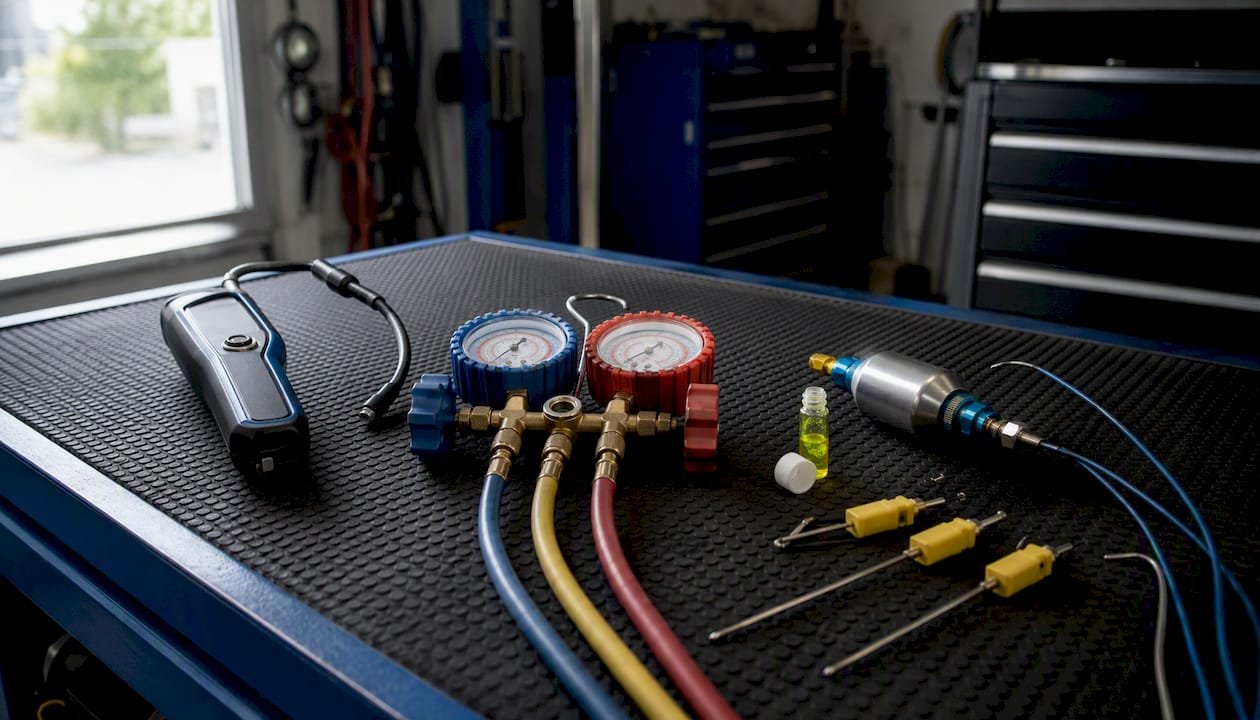
Your equipment list should include a recovery/recharge machine, a two-stage vacuum pump, a manifold gauge set rated for the refrigerant in question, an electronic leak detector, a UV dye kit with a compatible inspection lamp, an oil injector, and a couple of temperature probes for vent and ambient readings. Add the usual hand tools: flare wrenches, a torque wrench for fittings, and retaining clip pliers for quick-connect couplings.
Consumables matter just as much as hardware. Stock the correct refrigerant for the vehicle in front of you, OEM-spec oil (PAG or POE, matched to the compressor), a small supply of UV dye, replacement O-rings sized for the fittings you’re likely to open, and spare receiver-drier or accumulator units for common platforms you service often.
Personal protective equipment isn’t optional here. Refrigerant under pressure can cause frostbite on contact, and some blends are irritating to eyes and mucous membranes. Wear:
- Safety glasses or a face shield
- Nitrile or chemical-resistant gloves for dye and oil handling
- Heat-resistant gloves near compressor and hose connections
- A shop apron and closed-toe boots
Work in a ventilated bay, and have a spill protocol in place, even though modern recovery machines make accidental releases rare.
On the regulatory side, EPA Section 608 certification is a requirement for anyone who “opens” a system containing refrigerant, not a suggestion for the cautious. You also need to log recovered refrigerant by type and quantity, and store full recovery cylinders separately from virgin stock to avoid cross-contamination.
Pro Tip: Check your recovery/recharge machine’s calibration against its operator manual on a set schedule. A machine reporting mass incorrectly will throw off every oil and refrigerant calculation downstream, and you won’t know it until a car comes back undercharged.
How Do You Run Pre-Service Checks on a Car AC System?
Pre-service diagnosis tells you whether you’re chasing a refrigerant problem, an electrical fault, or something mechanical, and it takes ten minutes if you work through it in order.
- Interview the customer: intermittent cooling, no cooling, weak airflow, or odor complaints all point in different directions.
- Do a visual inspection: look for oil residue at fittings, damaged hoses, a compressor clutch that looks loose, or a condenser with crushed fins.
- Check the cabin air filter. A clogged filter mimics a refrigerant problem by killing airflow at the vents.
- Check fuses and blower motor operation across all fan speeds.
- Identify the refrigerant type from the underhood label, and confirm it against the service port fitting size (R-134a and R-1234yf use different couplers by design, so this step also protects your gauge set from cross-contamination).
- Locate the high and low side Schrader valves before you connect anything.
Static pressure readings are only meaningful once the system has sat undisturbed. Diagnostic guidance recommends letting the vehicle sit for at least an hour before taking static pressure readings, then comparing that number against an ambient-temperature reference chart. A car that’s been driven or sitting in direct sun for hours will give you a misleading static reading that looks like overcharge when it’s really just heat soak.
Before you touch the recovery machine, document baseline data: current vent temperature, whether the compressor clutch engages at all, any unusual noise from the compressor or blower, visible oil or dye at fittings, and whether a prior dye tag is present on the underhood label. That last item saves you from adding a second color of dye into a system that already has one, which turns your UV inspection into a guessing game later.
What’s the Right Way to Find a Refrigerant Leak?
Start with an electronic leak detector every time, then move to UV dye only if the sniffer comes up empty or you need to confirm a suspect area. This sequence avoids wasting dye injection time on a leak the sniffer would have caught in ninety seconds.
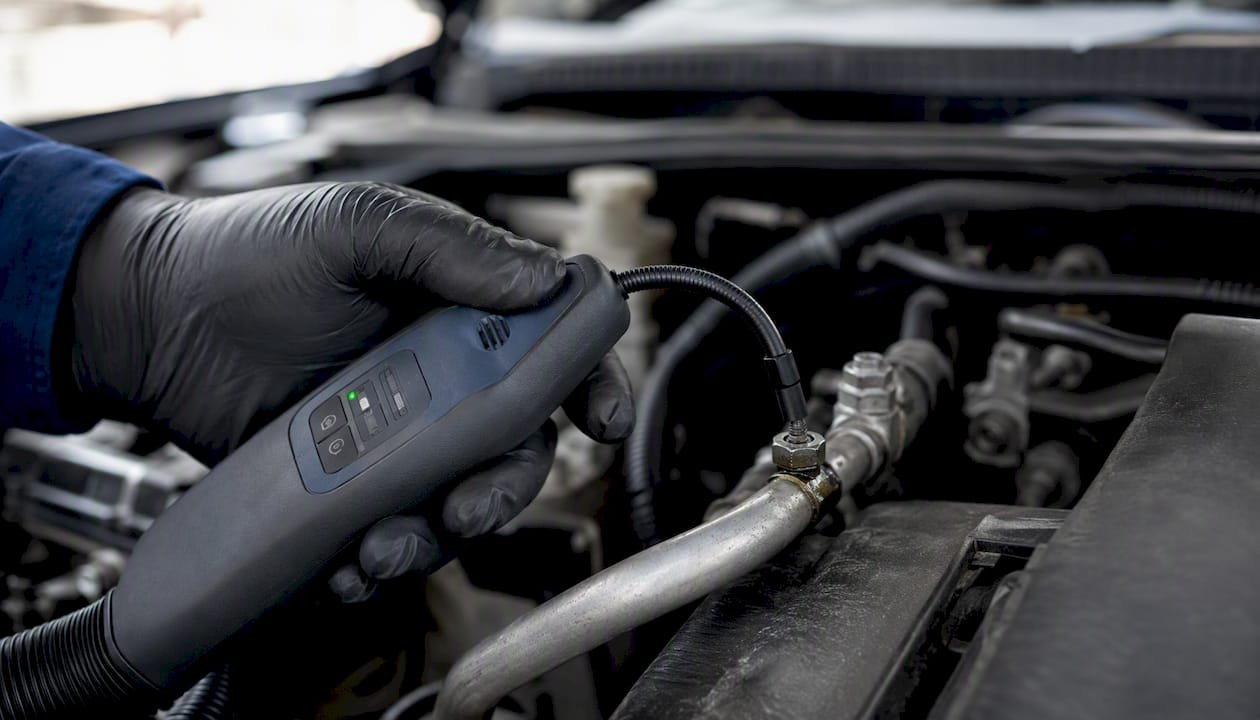
Electronic detectors work by sensing halogen compounds in refrigerant vapor. Common pitfalls: sweeping the probe too fast, holding it too far from the suspected fitting, or working in a drafty bay where ambient air carries the vapor away before the sensor picks it up. Also watch evaporator access. It’s tucked behind the dash on most platforms, so a whole-cabin sniff at the vents is often your only practical option without pulling the HVAC housing.
When you move to dye, follow the kit’s sequence closely. OEM leak-detection kit documentation is specific: purge the injector hose of air, install the dye capsule, inject through the low-side port, and give it time to circulate, never inject dye into a system that’s already been evacuated. A large leak will show color at the fitting within minutes of running the compressor. A small leak can take up to 90 minutes of run time before it’s visible under a UV lamp, so don’t declare a system leak-free after five minutes under the hood.
Other methods still earn a place in your workflow. A soap-and-water solution catches larger leaks cheaply and works well on fittings you can reach by hand. Pressurizing an open system with dry nitrogen and gauge-monitoring for pressure drop is useful when refrigerant has already been fully recovered and you want to isolate a section before committing to a repair. Techs who’ve run this workflow across a range of platforms recommend rotating through multiple detection methods rather than trusting one tool for every leak, since access and leak rate both change which method actually works on a given car. Prioritize your visual inspection at fittings, brazed or welded joints, the compressor shaft seal, and the condenser face, since that’s where the majority of leaks actually originate.
Pro Tip: Always check for existing dye before adding more. A quick UV sweep of the underhood label and evaporator drain tube tells you if a previous shop already dosed the system, which keeps your inspection results honest.
A word of caution: UV dye stains light-colored interior trim and engine bay plastics if you’re sloppy with the injector, and not every UV lamp on the market is tuned to the wavelength that makes automotive dye fluoresce clearly. Cheap flashlight-style “UV” lamps often underperform here.
Recovering Refrigerant and Measuring the Oil That Comes Out
Recovery isn’t just “suck the gas out.” Done right, it’s also your best opportunity to quantify how much oil has left the system, which sets up every calculation in the recharge step.
Connect your recovery machine’s high and low side hoses to the vehicle’s service ports, purge the hoses of air first, and let the machine run its recovery cycle according to its own prompts. Machines built to OEM-aligned routines, as detailed in Tesla’s Model S service documentation, will automatically separate recovered oil into a sight glass or measurement chamber as part of the recovery cycle.
- Flush and purge hoses before connecting to the vehicle.
- Connect high and low side couplers to the correct service ports.
- Start the machine’s recovery cycle and let it run to completion, don’t interrupt it early.
- Record the recovered refrigerant mass shown on the machine display.
- Record the oil volume collected in the sight tank or measurement chamber.
- Transfer recovered refrigerant to a labeled recovery cylinder, never mix it with virgin stock.
Oil accounting is simple math once you have the recovery number: oil to add back equals oil removed, plus oil that comes pre-loaded in any new component you’re installing (a new compressor typically ships with a factory oil charge you’ll need to drain to match the old unit, a step covered later in this piece). Never estimate oil quantity by “topping off until it looks right.” Undercharged oil starves the compressor; overcharged oil reduces cooling capacity by taking up space refrigerant should occupy.
| What to record | Why it matters |
|---|---|
| Recovered refrigerant mass | Sets your target recharge amount and flags undercharge from a leak |
| Oil volume recovered | Baseline for calculating oil to reinject |
| Refrigerant type confirmed | Prevents cross-contamination between R-134a and R-1234yf stock |
| Component oil pre-charge (if replacing parts) | Subtracted or added depending on OEM spec for that part |
Never mix refrigerant types in one recovery cylinder, and never send a disposable cylinder for disposal without confirming it’s fully empty and depressurized. A refrigerant analyzer earns its cost back the first time it catches a contaminated recovery before it ruins a full cylinder of virgin stock.
Why the Vacuum and Decay Test Step Can’t Be Skipped
Vacuum does two jobs at once: it pulls trapped air out of the system, and it removes moisture that recovery alone can’t touch. Skip it or rush it, and you’re sealing water into a system that will corrode from the inside.
The reason vacuum removes moisture comes down to basic physics. Dropping system pressure lowers the boiling point of any residual water inside the lines and components, so it flashes to vapor and gets pulled out by the pump instead of sitting as liquid that will later mix with refrigerant and oil to form corrosive acids.
Typical OEM-style vacuum sequences run in stages: an initial 5 to 15 minutes evacuating just the hoses, followed by 15 to 30 minutes pulling vacuum on the full system, then a decay test where you isolate the system from the pump and watch whether vacuum holds steady over a set window, often 10 to 15 minutes depending on the machine’s programmed routine. A system that holds vacuum with no measurable rise has passed. One that climbs back toward atmospheric pressure has a leak you haven’t found yet, or a fitting that isn’t seated.
If the decay test fails, work through it methodically:
- Recheck every fitting you disturbed during the service.
- Isolate sections of the system with valves if your setup allows it, to narrow down where the leak lives.
- Pressure test with dry nitrogen if the electronic detector and dye haven’t pinpointed it.
- Re-run your leak detection workflow from the top rather than guessing at a fix.
Pro Tip: Any time you replace a receiver-drier, accumulator, or desiccant element, that’s a hard trigger to re-run the full vacuum and decay sequence, not just a quick pump-down. New desiccant needs the same moisture removal as the rest of the system, and skipping it defeats the purpose of the part swap.
Injecting Oil and Recharging the System by Weight
This is where your earlier measurements pay off. Add the oil first, then charge refrigerant by mass, and the sequence matters because most A/C machines expect a dry, oil-charged system before they’ll run a clean recharge cycle.
The calculation is straightforward: oil to add equals oil removed during recovery, plus any oil that came pre-loaded in a replacement component, plus whatever additional amount the OEM spec calls for on that specific platform. If you recovered 120 milliliters of oil and installed a new compressor pre-filled with 90 milliliters that needs draining to match a 60 milliliter factory spec, you’re adding back roughly 90 milliliters total, not just the recovered amount.
- Drain any excess pre-charge from a new component to match OEM spec before installation.
- Inject the calculated oil amount using a dedicated oil injector, not the A/C machine’s bulk refrigerant line, unless the machine has a specific oil-injection mode built in.
- Confirm the injector is charged with the correct oil type (PAG viscosity grade or POE, matched to the compressor manufacturer’s spec).
- Set the recharge amount on the A/C machine to the OEM-specified full charge weight, not the recovered amount, since a leaking system likely lost some over time.
- Charge through the correct port, high side or low side depending on machine and OEM instruction, and let the machine complete its programmed cycle.
- Confirm final charge weight against the underhood label spec before disconnecting.
Never overfill oil “just to be safe.” Excess oil coats the inside of the evaporator and condenser, cutting heat transfer efficiency and measurably reducing cooling performance. Never mix refrigerant types in the same system, even in small amounts, since it contaminates the entire charge and can damage seals rated for one refrigerant chemistry but not another.
Pro Tip: If your A/C machine has a UV dye injection option built into the recharge cycle, use it on any vehicle you didn’t already dye during leak detection. It costs you nothing extra and sets up an easy follow-up inspection if the customer comes back with a complaint six months later.
How Do You Verify AC Performance After Service?
A recharge isn’t finished until you’ve confirmed the system actually performs to spec, not just that the machine says it added the right weight of refrigerant.
Run the engine at a stabilized idle or a specified RPM (check the OEM procedure for the exact figure, since it varies by platform), with the AC on max cold and the blower on high. Let pressures settle for a couple of minutes before reading. Record high-side and low-side running pressures, then measure vent temperature at the center registers along with ambient cabin air temperature to calculate the cooling differential. Confirm the compressor clutch is cycling normally rather than staying locked on or dropping out early, both of which point to charge or electrical problems even after a technically correct recharge.
Readings well outside these ranges point to undercharge, overcharge, or a restriction, and it’s worth rechecking your recharge weight against the underhood spec before assuming a new fault. R-1234yf systems run somewhat different pressure curves than R-134a, so confirm you’re referencing the correct chart for the refrigerant actually in the car.
Before handing the vehicle back:
- Label the service with refrigerant type and total mass added.
- Note any component replacements and oil quantities used.
- Flag any advice for a return visit if a borderline reading concerned you.
- Run the AC for 5 to 10 minutes and recheck for leaks or fresh dye visibility at fittings before the customer drives off.
When Should You Replace Parts Instead of Just Repairing Them?
Some components are worth repairing. Others just need to come off the car, and knowing the difference saves you from chasing a leak that a $40 part would have solved in twenty minutes.
A receiver-drier or accumulator that’s been open to atmosphere for more than a short window has almost certainly absorbed moisture into its desiccant and needs replacement, not just a vacuum cycle. Visible oil pooling at a fitting that won’t stop after retorquing usually means a damaged seal or a cracked line, not something a sealant product will fix long-term. Condenser fins that are crushed or corroded through reduce heat rejection enough that no amount of correct charging will hit spec vent temperatures. A compressor clutch that’s noisy, slipping, or won’t engage at all, especially after a full electrical check comes back clean, points to internal compressor failure.
Replacing a compressor after a catastrophic failure isn’t just a bolt-in swap. Metal debris from a failed compressor circulates through the entire system, so a full flush of the lines, condenser, and evaporator is mandatory before the new compressor goes in, or you’ll kill the replacement within weeks. Match the new compressor’s oil charge to the old unit’s spec by draining and measuring rather than trusting the factory fill, then replace the receiver-drier as a matter of course since it’s cheap insurance against sending contaminated refrigerant through a fresh system. Re-run your full vacuum and decay sequence after any of this work.
Pro Tip: Set customer expectations early on compressor jobs. Between flushing, oil matching, and desiccant replacement, it’s a longer job than a simple recharge, and pricing it like one will cost you money and their trust.
Roughly one in five automotive AC calls that start as “it’s not cold” end up being a component failure rather than a simple leak, which is part of why a full diagnostic pass matters more than a quick top-off.
Troubleshooting Checklist for Post-Service Problems
Most comebacks trace to one of a handful of causes, and a fast checklist gets you to the answer before you’ve even popped the hood a second time.
- Recheck refrigerant charge and static pressures against the spec chart for that ambient temperature.
- Feel suction and discharge line temperatures, a cold discharge line usually means undercharge or a restriction.
- Confirm compressor clutch engagement and listen for clutch cycling patterns.
- Check fuses, relays, and HVAC control module inputs if the compressor won’t engage at all.
- Inspect the cabin air filter and duct paths if airflow is weak but the system reads correctly on gauges.
- Sweep for residual dye at fittings you serviced, since a slow leak sometimes only shows color after a few days of running.
A car with no cooling at all and a compressor that won’t engage points toward electrical first, check fuses and relays before you connect a single gauge. A car that’s cold but weak on airflow is almost always a filter or duct issue, not a refrigerant problem. Save yourself a recovery cycle by ruling out the cheap, fast checks before you touch the high side. Anything involving a strong burning smell or visible smoke warrants an immediate return visit rather than a scheduled follow-up.
Stocking Your Shop for Reliable AC Service Work
A shop is only as good as the equipment on the wall, and this is where an underfunded AC bay quietly costs you money through comebacks and slow jobs.
At minimum, stock a calibrated recovery/recharge machine, a two-stage vacuum pump rated for automotive volumes, a manifold gauge set for each refrigerant type you service, an electronic leak detector, UV dye kits, an oil injector, and refrigerant cylinders across the types your customer base actually needs, R-134a and R-1234yf at minimum, with R-407C and other blends stocked if you handle fleet or commercial HVAC crossover work.
A shop that stocks the wrong refrigerant, or runs out mid-job, either turns away paying work or sends a tech across town for a single cylinder. Bulk wholesale access to virgin refrigerant, including bulk formats like 25LBS R407C, keeps a multi-service bay running without a mid-week supply scramble.
Hvac-prime’s product range covers the refrigerant types and diagnostic tools referenced throughout this procedure, which makes it a practical single source for shops that don’t want to juggle three suppliers for one job. When buying equipment, check four things before you spend the money: current calibration certification on any recovery machine, EPA 608 credentials for the techs who’ll run it, warranty terms on vacuum pumps (they take the most abuse of any tool in the bay), and confirmed compatibility with both R-134a and R-1234yf coupler standards if you service a mixed fleet.
Pro Tip: Buy one extra set of quick-connect couplers in each refrigerant standard. They’re the cheapest part in your kit and the first thing that gets lost or damaged mid-job.
A Technician’s Take: The Habits That Actually Prevent Comebacks
The biggest gap in this trade isn’t technical skill, it’s discipline around the boring steps. Every experienced tech has a story about a comeback that traced back to skipping oil measurement or trusting a five-minute dye check on a slow leak.
Running the AC for a few minutes once a month, even in winter, isn’t an old wives’ tale. Compressor shaft seals dry out when a system sits idle, and periodic operation keeps oil circulating across that seal rather than letting it sit dry and crack. It’s a habit worth passing on to customers, not just something you do to your own vehicles.
The pitfalls that cause repeat visits are almost always the same three: topping off refrigerant without repairing the leak that caused the loss, skipping the oil measurement step because “it’s probably fine,” and either misusing dye (injecting into an evacuated system) or over-injecting it until the whole engine bay glows under a UV lamp. Add a fourth: ignoring a failed decay test because the customer’s waiting and you’re behind schedule. That one comes back to bite you every time.
Good recordkeeping habits solve most of this before it starts. Log recovered mass, oil volume, and refrigerant type on every job card, not just the ones where something seemed off. When a customer calls back in three months, that record tells you in thirty seconds whether you’re looking at a new problem or a repeat of the old one.
Get the Refrigerant and Tools This Procedure Requires
Every step in this procedure assumes you’re working with virgin refrigerant and calibrated tools, not questionable cylinders from an unverified source. Hvac-prime sells wholesale virgin refrigerant across the types this article covers, R-134a, R-1234yf, and bulk R-407C, alongside the diagnostic kits, injectors, and gauge sets a full AC service demands, at pricing built for contractors running multiple jobs a week, not single-cylinder retail markups.
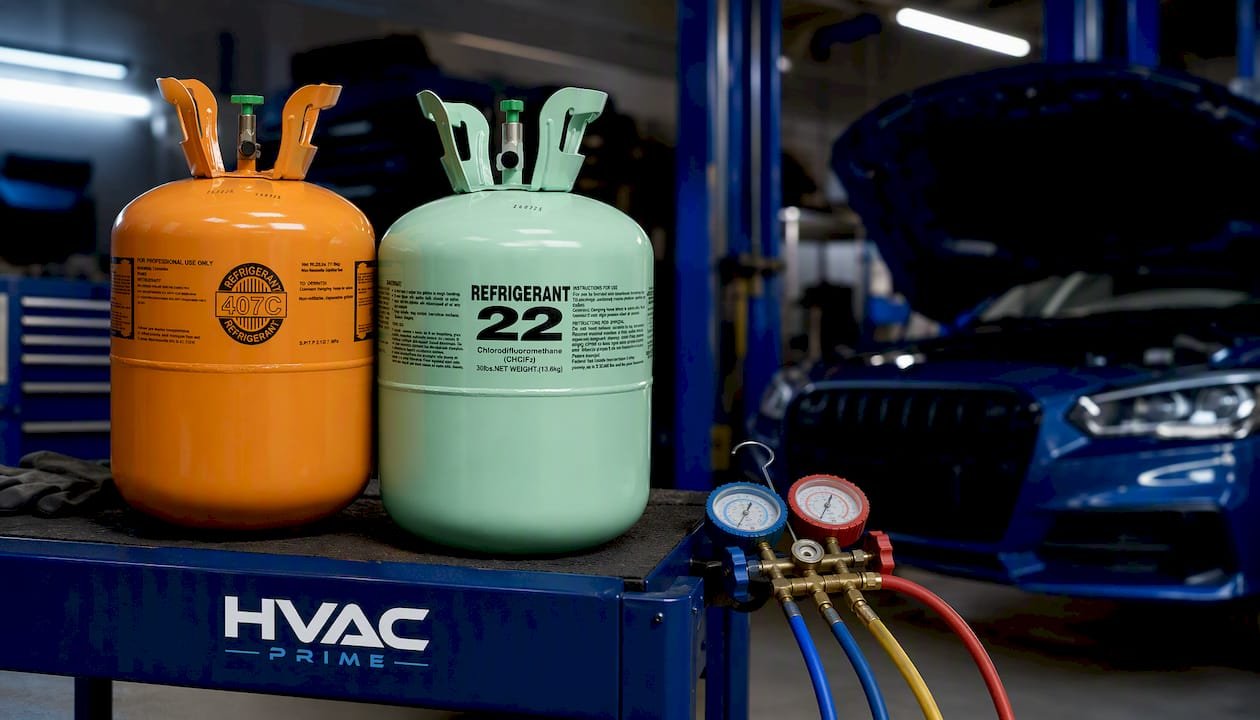
If your shop burns through refrigerant fast enough that supplier delays cost you billable hours, that’s the exact problem Hvac-prime’s fast shipping model addresses. Stock a 25LBS R407C cylinder for commercial crossover work, pull from the same source for R-134a and R-1234yf cans your automotive bay uses weekly, and keep EPA 608 certification current for every tech who’ll be opening a system. Check current stock and pricing at the Hvac-prime shop before your next scheduled service day.
Frequently Asked Questions
How long does a full automotive AC service procedure typically take?
A straightforward recharge with no leak found generally runs an hour to ninety minutes. Add leak repair, a receiver-drier swap, or compressor replacement, and the job extends to several hours once flushing and full vacuum cycles are factored in.
Can I perform an automotive AC service procedure without a recovery machine?
No, legally or practically. EPA regulations require certified recovery equipment for opening any system containing refrigerant, and a recovery machine is also how you get an accurate oil measurement, which a DIY can-and-gauge setup can’t provide.
What’s the difference between servicing an R-134a system and an R-1234yf system?
The core procedure is identical: diagnose, recover, vacuum, recharge, verify. The differences are physical, R-1234yf uses different service port couplers and runs somewhat different pressure curves, so you need refrigerant-specific gauges and reference charts.
How do I know if my car AC just needs a recharge or a full repair?
If static pressure reads low and no leak shows up after a proper electronic and UV dye inspection, a straight recharge may be appropriate. If you find any leak, however small, repair takes priority over recharging, since adding refrigerant to a leaking system is only a temporary measure.
What causes a car AC compressor to not engage at all?
Most often it’s an electrical fault, a blown fuse, a bad relay, or a low-pressure safety switch that’s cutting power because the system is critically low on refrigerant. Check electrical components before assuming the compressor itself has failed.
Sources
- DIY Automotive Air Conditioning Repair and Diagnostics Guide – Kelley Blue Book
- How to Maintain Your Car’s Air Conditioning System: A Complete Guide for U.S. Drivers – Carvira
- How to find refrigerant leaks in automotive AC systems — tips for techs




 HVAC
HVAC Automotive
 Refrigerant Diagnostics Kit
 Water Heaters